
Introduction to Garlic Bread Rolls
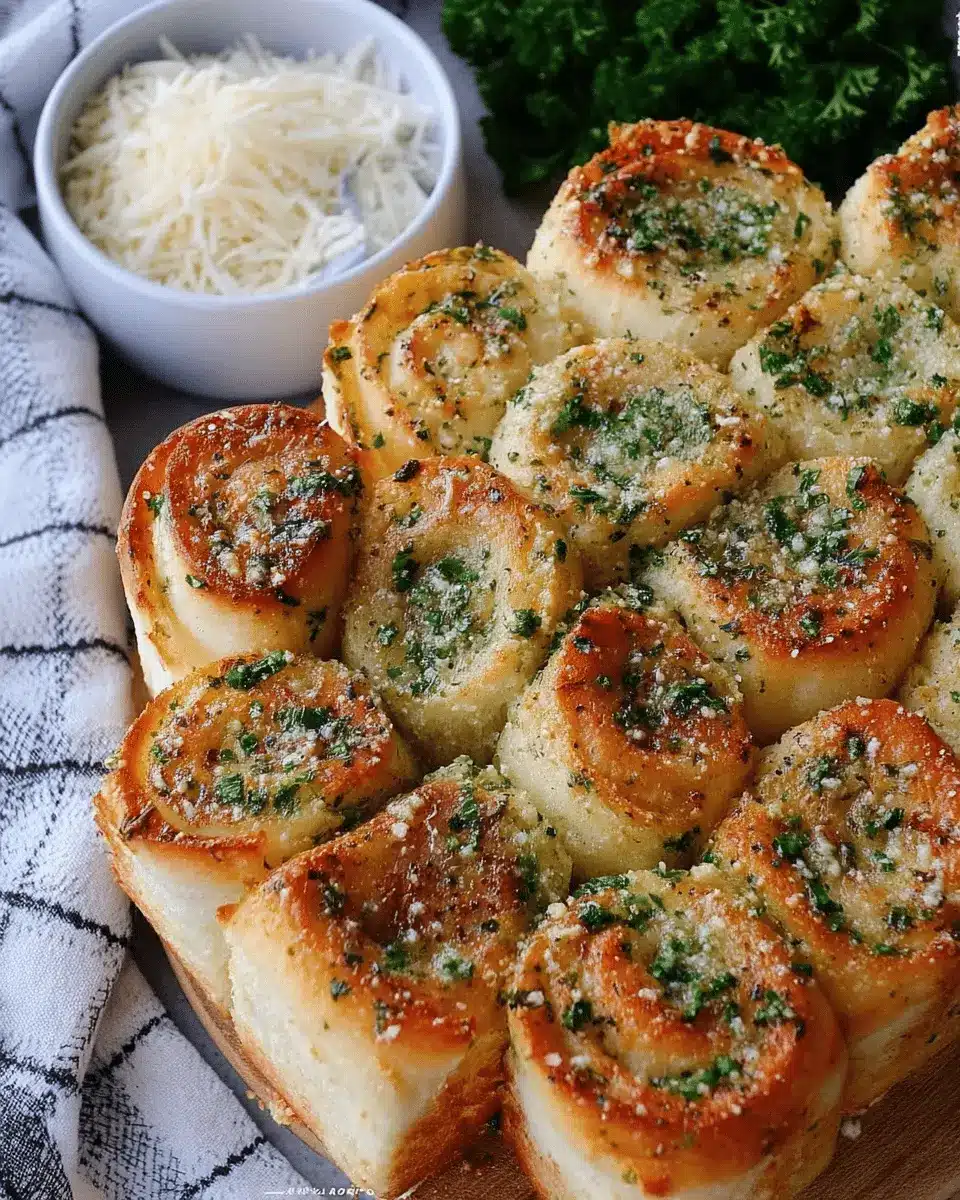
Who can resist the inviting aroma of freshly baked Garlic Bread Rolls? These little delights are not only perfect for sharing but also elevate any meal to the next level. Imagine pulling apart soft, pillowy rolls filled with a rich, savory garlic and herb butter that oozes with flavor as you tear into them. It's a culinary hug in every bite!
What makes Garlic Bread Rolls a must-try?
Whether you're hosting a cozy dinner or just want to treat yourself, these rolls are a must-try for several reasons:
- Versatility: Perfect as a starter, side dish, or even a snack, they pair wonderfully with soups, salads, or pasta dishes.
- Comfort Food: The combination of warm bread and aromatic garlic brings a delightful ‘homey’ feeling to any table.
- Easy to Make: With a straightforward recipe, even novice bakers can impress family and friends.
If you want to dive deeper into the world of garlic and herbs, check out this article that beautifully highlights how these flavors can transform everyday dishes. Ready to roll? Let's get started on making your very own Garlic Bread Rolls!
Ingredients for Garlic Bread Rolls
When it comes to crafting the perfect Garlic Bread Rolls, the quality of your ingredients is key. Let’s dive into what you'll need for this delightful recipe!
The Dough
- Strong White Bread Flour: 600 g (plus a little extra for dusting). This flour gives the rolls their wonderful structure.
- Dried Active Yeast: 14 g. This is the magic ingredient that makes your rolls fluffy and airy.
- Caster Sugar: 1 tbsp. Just a touch of sweetness to complement the garlic.
- Unsalted Butter: 90 g (cold & cubed) for a rich texture.
- Full Fat Milk: 275 ml, warmed slightly to help activate the yeast.
- Egg: 1 medium egg to enrich the dough.
- Sea Salt: ½ tsp. Essential for flavor, don’t skip it!
The Filling
For that glorious garlic and herb burst in every bite, gather these ingredients:
- Unsalted Butter: 45 g, melted.
- Garlic Cloves: 4+ (finely chopped) for that irresistible aroma.
- Dried Mixed Herbs: 1 teaspoon for a herby touch.
- Sea Salt: ½ teaspoon to enhance flavors.
- Fresh Parsley: 15 g, chopped, for freshness.
- Parmesan Cheese: 25 g, grated, because who doesn't love cheese?
These ingredients come together to create mouthwatering Garlic Bread Rolls that will make your kitchen smell heavenly! Don't forget, you can find more tips on how to select the right ingredients at BBC Good Food for a top-notch baking experience!
Preparing Garlic Bread Rolls
Creating the perfect Garlic Bread Rolls is more than just following a recipe; it’s about enjoying the process and savoring the delightful smells that fill your kitchen. Let’s dive into the steps that will take your rolls from mere ingredients to a tantalizing treat!
Gather Your Ingredients
First things first—get organized. Head to your kitchen and gather the ingredients listed below for the dough, filling, and topping. Here’s what you’ll need:
-
The Dough:
-
600 g strong white bread flour (plus extra for dusting)
-
14 g dried active yeast
-
1 tablespoon caster sugar
-
90 g unsalted butter (cold & cubed)
-
275 ml full-fat milk
-
1 medium egg
-
½ teaspoon sea salt
-
The Filling:
-
45 g unsalted butter (melted)
-
4+ garlic cloves (finely chopped)
-
1 teaspoon dried mixed herbs
-
½ teaspoon sea salt
-
15 g fresh parsley (chopped)
-
25 g parmesan (grated)
-
The Topping:
-
25 g parmesan
-
fresh parsley (chopped)
Check your pantry; having everything at your fingertips will make the process smoother!
Activate the Yeast
Next, we need our dough to rise! If you're using dried active yeast, dissolve it in warm (not hot) milk with the caster sugar. Give it about 5-10 minutes until it becomes frothy. This step is crucial for the yeast to do its magic. If you’re curious about yeast, check out this great guide on yeast types.
Make the Dough
In a large bowl, sift the flour and combine it with the salt, yeast mixture, beaten egg, and cold cubed butter. Knead the dough for 7-10 minutes until it’s smooth and elastic. This can get sticky, but stick with it! A KitchenAid mixer can certainly ease this process if you have one.
Let the Dough Rise
Transfer your beautiful dough into a lightly oiled bowl and cover it with cling film. Set it aside in a warm place for about 1-2 hours, or until it doubles in size. This is a great time to admire your handiwork or take a short break!
Prepare the Garlic Herb Filling
While your dough rises, let's whip up the mouthwatering filling. Melt the butter and mix in the finely chopped garlic, herbs, parsley, and salt. The aroma alone is enough to get your taste buds tingling!
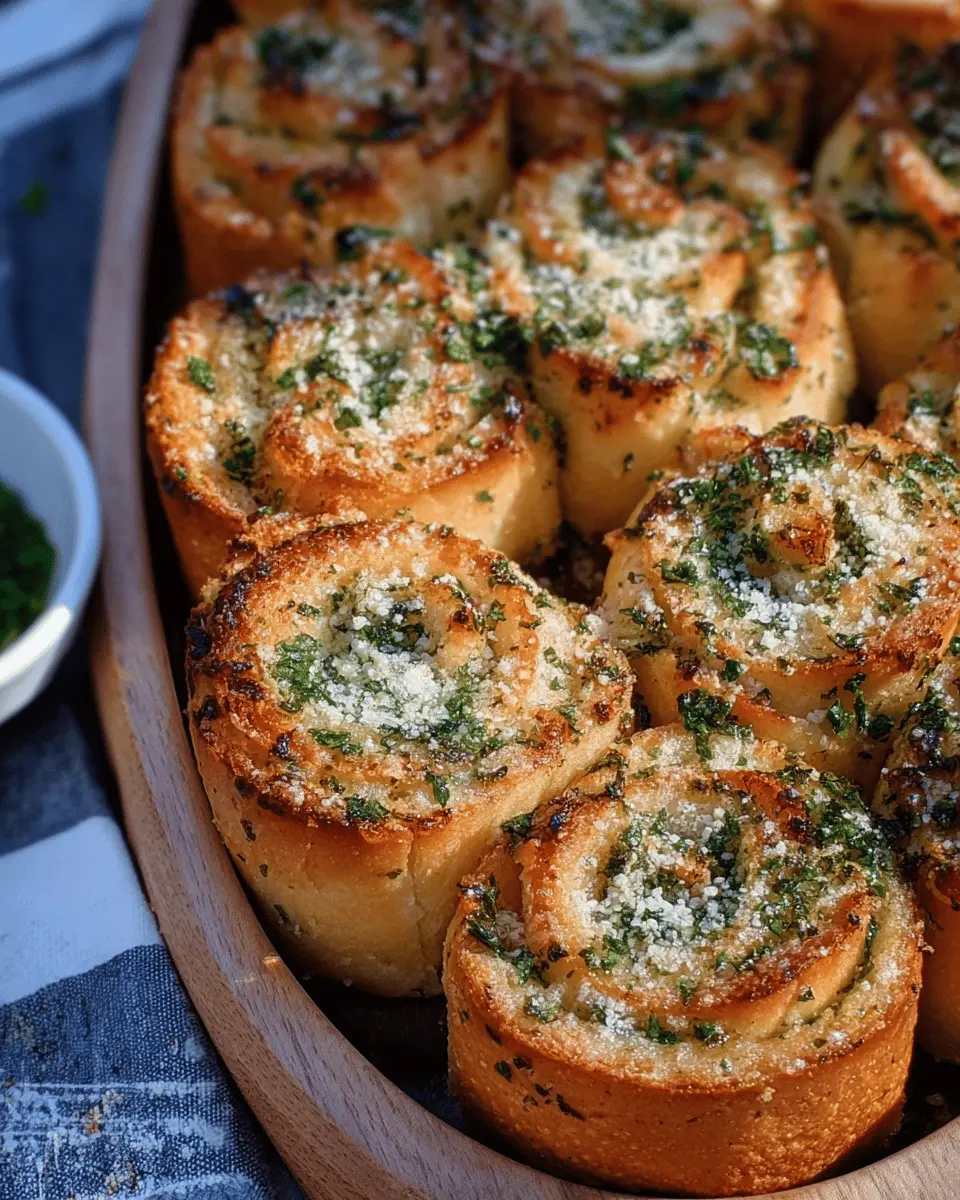
Shape the Rolls
Once your dough is ready, roll it out into a rectangle on a lightly floured surface. Spread the garlic herb filling evenly across the surface. Then, roll up the dough from one long side to the other and slice into 12 pieces.
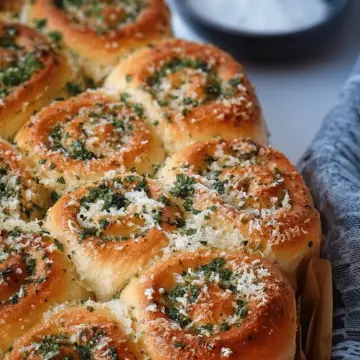
Second Rise
Place the rolls into a greased baking dish. Cover them and let them rise again for about an hour or until they’re touching each other. This step is vital for achieving that fluffy, pull-apart texture.
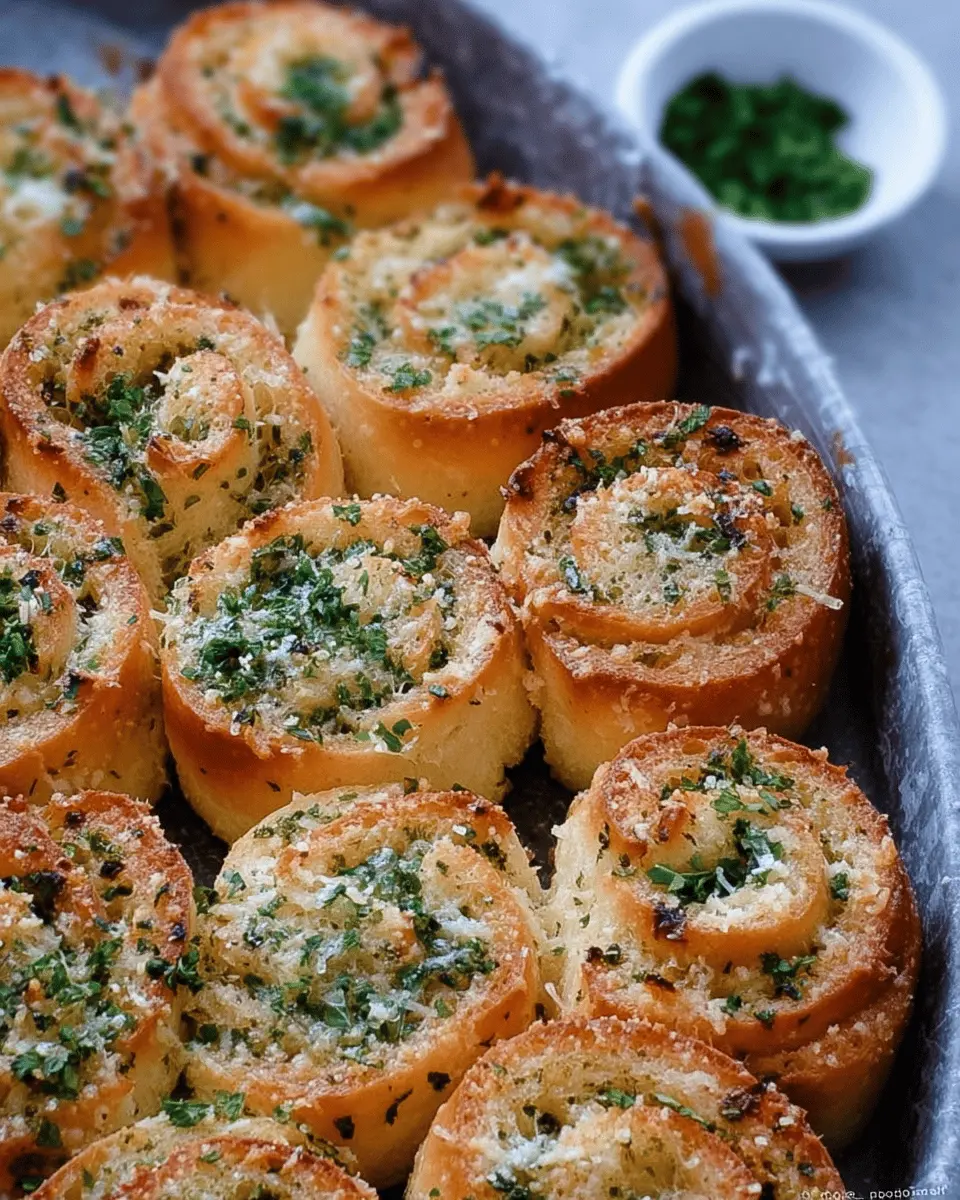
Bake the Rolls
Preheat your oven to 180°C (160°C fan) while your rolls have their second rise. Bake them for 20-25 minutes until they’re beautifully golden brown on top.
Once they come out, sprinkle more parmesan and fresh parsley for that extra flair. Enjoy the irresistible warmth and fragrance of your homemade Garlic Bread Rolls fresh from the oven!
These rolls are best eaten on the same day, but they do keep well for a couple of days when covered. If you enjoy baking, consider trying different fillings or even adding cheese for that extra indulgence!
Variations on Garlic Bread Rolls
Cheesy Garlic Bread Rolls
If you're a cheese lover, these Garlic Bread Rolls are a must-try! Simply add 100-200g of grated mozzarella or your favorite melting cheese to the garlic and herb butter filling. The gooey cheese enhances the flavor and makes for a delightful surprise in every bite. Imagine pulling apart these rolls with melted cheese stretching between them—pure comfort food! For an extra touch, sprinkle some cheddar on top before baking for a golden, crispy finish.
Herb-Infused Rolls
For those who enjoy a herbaceous twist, consider infusing your Garlic Bread Rolls with fresh or dried herbs. Rosemary, thyme, or basil can elevate the flavor profile and add a fragrant touch. Simply mix in a tablespoon of your chosen herbs into the butter filling and watch as the aroma fills your kitchen. This variation not only enhances the taste but also adds a beautiful pop of color to your rolls. Don't forget to check out this article for more ideas on using herbs in cooking!
Cooking Tips and Notes for Garlic Bread Rolls
When crafting these Garlic Bread Rolls, a few tips will elevate your baking game.
- Dough Consistency: Knead until the dough is smooth and elastic; it should bounce back when lightly poked. This ensures a fluffy texture.
- Perfect Proving: For an ideal rise, place the dough in a warm, draft-free area. If you’re in a hurry, a slightly turned-on oven (turned off afterwards) can do the trick too!
- Flavor Variations: Don’t hesitate to experiment! Add your favorite cheese or adjust herbs based on what's in your pantry—basil or oregano work wonders.
- Make Ahead Magic: Consider prepping the filling and shaping the rolls a day in advance. Just pop them in the fridge overnight for hassle-free baking.
These Garlic Bread Rolls are best enjoyed fresh, but any leftovers can be wrapped tightly for a couple of days of deliciousness.
For more delicious garlic recipes, check out Epicurious or BBC Good Food, which feature great garlic-inspired dishes!
Serving suggestions for Garlic Bread Rolls
When it comes to enjoying Garlic Bread Rolls, the possibilities are as delicious as they are varied! Here are some delightful serving ideas to elevate your dining experience:
-
Pair with Soups and Salads: These rolls make a perfect side for classic tomato soup or a fresh garden salad, adding a rich, buttery flavor that balances out the meal.
-
Dipping Sauce Delight: Create an irresistible dipping sauce with melted butter and fresh herbs or a zesty marinara. Trust me, it takes the flavor up a notch!
-
Make it a Meal: Serve your Garlic Bread Rolls alongside dishes like roasted chicken or creamy pasta for a comforting and fulfilling dinner.
Explore more pairing options in this soup and bread guide. Enjoy your rolls!
Time Breakdown for Garlic Bread Rolls
When it comes to creating delicious Garlic Bread Rolls, it's all about knowing the right timing for each step. Here's a quick breakdown to help you plan your baking adventure:
Preparation Time
Expect to spend about 35 minutes getting your dough ready. This includes mixing the ingredients and kneading until you have a smooth, elastic texture.
Proving Time
Don't rush this step! Let your dough rise for 3 hours. This allows the yeast to work its magic, resulting in fluffy and airy rolls.
Baking Time
Once your rolls have risen, they’ll need approximately 25 minutes in the oven to become golden brown.
Total Time
In total, you're looking at about 4 hours from start to finish. Most of this is hands-off time, allowing you to tend to other tasks or maybe enjoy a cup of coffee while you wait!
Whether you make these for a casual dinner or a special occasion, investing time in these Garlic Bread Rolls will surely pay off with delightful flavor and texture. For more tips on ingredient selection, check out reliable resources like The Kitchn for expert baking advice!
Nutritional Facts for Garlic Bread Rolls
When enjoying homemade Garlic Bread Rolls, knowing their nutritional content can help you make mindful choices. Here’s a quick breakdown:
Calories
Each roll contains approximately 180 calories, making them a tasty yet indulgent addition to your meal.
Protein
You’ll find about 4 grams of protein per roll, thanks to the bread and cheese, perfect for a satisfying snack!
Sodium
With roughly 250 mg of sodium, these rolls are flavorful but still manageable in your diet. Enjoy them as a delightful treat with your favorite pasta dish!
For more detailed nutritional information and tips on how to incorporate garlic bread rolls into a balanced meal, you can check out resources like the USDA FoodData Central. Making informed choices helps you savor every bite guilt-free!
FAQs about Garlic Bread Rolls
Can I make these rolls ahead of time?
Absolutely! You can prepare your Garlic Bread Rolls in advance. Once you've shaped the rolls, place them in the fridge overnight instead of letting them rise at room temperature. This slow rise enhances the flavor and makes for a delightful surprise when you pop them in the oven the next day.
What should I do if my dough doesn’t rise?
If your dough isn’t rising, it could be due to several factors. First, make sure your yeast is fresh and active; using dried active yeast that’s expired will do more harm than good. If your dough was in a cold environment, try placing it in a warm area (like near a heater or in a turned-off oven with the light on) for better results. Remember, patience is key—sometimes it simply needs a bit more time!
How do I store leftover Garlic Bread Rolls?
To store your leftover Garlic Bread Rolls, let them cool completely, then place them in an airtight container at room temperature. They will stay fresh for a couple of days. For longer storage, consider freezing them. Just wrap each roll well in plastic wrap and place them in a freezer bag. When you're ready to enjoy them again, simply thaw and reheat in the oven for that fresh, homemade taste! For more tips on storing bread, check out The Kitchn's guide.
Conclusion on Garlic Bread Rolls
In conclusion, these Garlic Bread Rolls are a delightful addition to any meal or gathering. Their irresistible aroma and flavor make them a perfect side dish or snack. Whether enjoyed fresh out of the oven or as leftovers, they're sure to impress! Don’t forget to experiment with your own fillings!
Garlic Bread Rolls!
Equipment
- large bowl
- KitchenAid with Dough Hook
- Large rectangular baking dish
- Pastry brush
Ingredients
The Dough
- 600 g strong white bread flour plus extra for dusting
- 14 g dried active yeast
- 1 tablespoon caster sugar
- 90 g unsalted butter cold & cubed
- 275 ml full fat milk
- 1 medium egg
- 0.5 teaspoon sea salt
The Filling
- 45 g unsalted butter melted
- 4+ garlic cloves finely chopped
- 1 teaspoon dried mixed herbs
- 0.5 teaspoon sea salt
- 15 g fresh parsley chopped
- 25 g parmesan grated
The Topping
- 25 g parmesan
- fresh parsley chopped
Instructions
Preparing the Dough
- Sift the flour into a large bowl, and add the caster sugar, yeast and sea salt. Mix these together so it's all evenly distributed.
- Rub the butter into the mixture so it resembles bread crumbs, like you would when making scones.
- Gently heat the milk until warm - but not piping hot.
- Add the milk and egg to the dry ingredients.
- Knead the dough together for 7-10 minutes.
- Transfer into a lightly oiled bowl, and cover the top of the bowl with cling film.
- Let it rise for 1-2+ hours, or until doubled in size.
Preparing the Filling and Shaping
- Whilst the dough is proving, prep the filling by finely chopping the garlic cloves, and prepping the parsley.
- Once the dough has risen, transfer to a lightly floured work surface, and roll out to a large rectangle.
- Mix the garlic into the melted butter, and brush over the bread dough.
- Sprinkle over the mixed herbs, sea salt, chopped parsley and parmesan.
- Roll the dough from long side to long side to form a long sausage. Cut evenly into 12 pieces.
- Place them into a large rectangular baking dish.
- Cover the dish with cling film, and let them rise for another hour or so.
Baking
- Towards the end of the dough rising, preheat the oven to 180C/160CFan.
- Bake in the oven for 20-25 minutes, until golden brown and cooked through.
- Leave to cool, and then sprinkle over some more fresh parsley and parmesan.

Leave a Reply