
Introduction to Apple Crisp Cheesecake
Creating your own desserts can be a game changer, especially when it comes to something as delightful as apple crisp cheesecake. Why opt for homemade over fast food? First, it's about freshness. The flavors of freshly baked goods can’t be matched by store-bought options laden with preservatives. Plus, when you bake at home, you control the quality of the ingredients. You can choose organic apples or premium cream cheese, elevating your dessert with each choice.
Moreover, it’s a wonderful way to make memories. Baking can be a creative outlet—a form of self-care, really. Whether you’re whipping up this apple crisp cheesecake for a gathering or for yourself on a cozy fall evening, the process can be equally rewarding. Studies show that engaging in cooking can reduce stress and even boost your mood source.
And let’s not forget the joy of sharing. There’s something special about presenting a homemade dessert to friends and family—it shows effort and care. So, the next time the craving hits, consider reaching for your apron instead of the fast-food drive-thru. Your taste buds (and your loved ones) will thank you!
Ingredients for Apple Crisp Cheesecake
Creating a delectable apple crisp cheesecake involves selecting the right components to achieve that creamy, tangy flavor paired with a delightful crunch. Here’s a breakdown of the key ingredients you'll need.
Essential components for the crust
To create a sturdy and flavorful base, you'll need:
- 3 cups graham cracker crumbs for a sweet crunchy texture.
- 3 tablespoons brown sugar to add depth.
- ½ teaspoon cinnamon for warmth.
- ½ cup unsalted butter (melted) to bind the crumbs together.
Key ingredients for the cheesecake filling
For that rich, creamy filling, gather these essentials:
- 24 ounces full-fat cream cheese at room temperature for a smooth texture.
- ¾ cup granulated sugar and ¼ cup brown sugar for sweetness.
- A splash of 1 teaspoon vanilla extract for flavor and ½ cup sour cream for creaminess.
- Don’t forget the 3 large eggs, which help set the cheesecake!
Fresh apples for the topping
Opt for 2 large apples; Granny Smith or Gala varieties work beautifully with their tartness. Toss them in 2 tablespoons of brown sugar and 1 ½ teaspoons of cinnamon to enhance their flavor.
Crisp topping essentials
For that irresistible crunch on top, you'll need:
- ½ cup all-purpose flour and ½ cup brown sugar for a sweet crumble.
- 1 teaspoon cinnamon to tie the flavors together.
- ½ cup quick oats for a wholesome chew.
- Finally, ¼ cup unsalted butter (melted) to bring it all together.
Once you've gathered these ingredients, you're on your way to making a delightful apple crisp cheesecake that's perfect for any gathering! For more tips on choosing apples, check out this apples guide and discover the unique flavor profiles that each variety offers.
Preparing Apple Crisp Cheesecake
Creating a delightful Apple Crisp Cheesecake is a perfect way to enjoy the flavors of fall in a delicious dessert form. Follow these detailed steps, and you’ll be amazed at how easily this creamy cheesecake comes together!
Step 1: Gather Your Equipment and Ingredients
Before diving into the deliciousness of this recipe, it’s essential to have everything you need. Here’s what you should gather:
-
Equipment:
-
9-inch springform pan
-
Large roasting pan (to create a water bath for the cheesecake)
-
Ingredients:
-
Graham cracker crumbs, brown sugar, cinnamon, unsalted butter
-
Apples (Granny Smith or Gala), more brown sugar, cinnamon
-
All-purpose flour, quick oats, more butter for the topping
-
Full-fat cream cheese, granulated sugar, sour cream, eggs, vanilla extract, and cornstarch
Make sure to check your pantry for these items beforehand so you won’t be rushing to the store in the middle of preparation!
Step 2: Make the Graham Cracker Crust
Starting with the crust, combine 3 cups of graham crumbs with 3 tablespoons of brown sugar and ½ teaspoon of cinnamon. Once mixed, add in ½ cup of melted unsalted butter and stir until well combined. Press this mixture firmly into the bottom and halfway up the sides of your springform pan. Bake it in your preheated oven at 350°F for about 8 to 10 minutes. This toasted crust will form the base of our Apple Crisp Cheesecake.
Step 3: Prepare the Cinnamon Apples
While the crust is baking, it’s time to prepare the apples. Peel and thinly slice 2 large apples and toss them with 2 tablespoons of brown sugar and 1 ½ teaspoons of cinnamon. Let them sit in the fridge to chill. This step ensures the apples get infused with that wonderful cinnamon flavor!
Step 4: Create the Oatmeal Crisp Topping
Next, let's take a moment to whip up that delicious topping. In a medium bowl, combine ½ cup all-purpose flour, ½ cup of brown sugar, 1 teaspoon of cinnamon, and ½ cup quick oats. Mix in ¼ cup of melted butter until the texture resembles damp sand. This topping adds an irresistible crunch to your Apple Crisp Cheesecake.
Step 5: Combine the Cheesecake Batter
In a large mixing bowl, beat 24 ounces of softened cream cheese with ¾ cup granulated sugar and ¼ cup brown sugar until smooth. Mix in 1 tablespoon of cornstarch or 2 tablespoons of all-purpose flour, 1 teaspoon of vanilla extract, and ½ cup sour cream. Finally, beat in 3 large eggs, one at a time. Make sure you mix just until combined to maintain that creamy texture.
Step 6: Assemble and Bake the Cheesecake
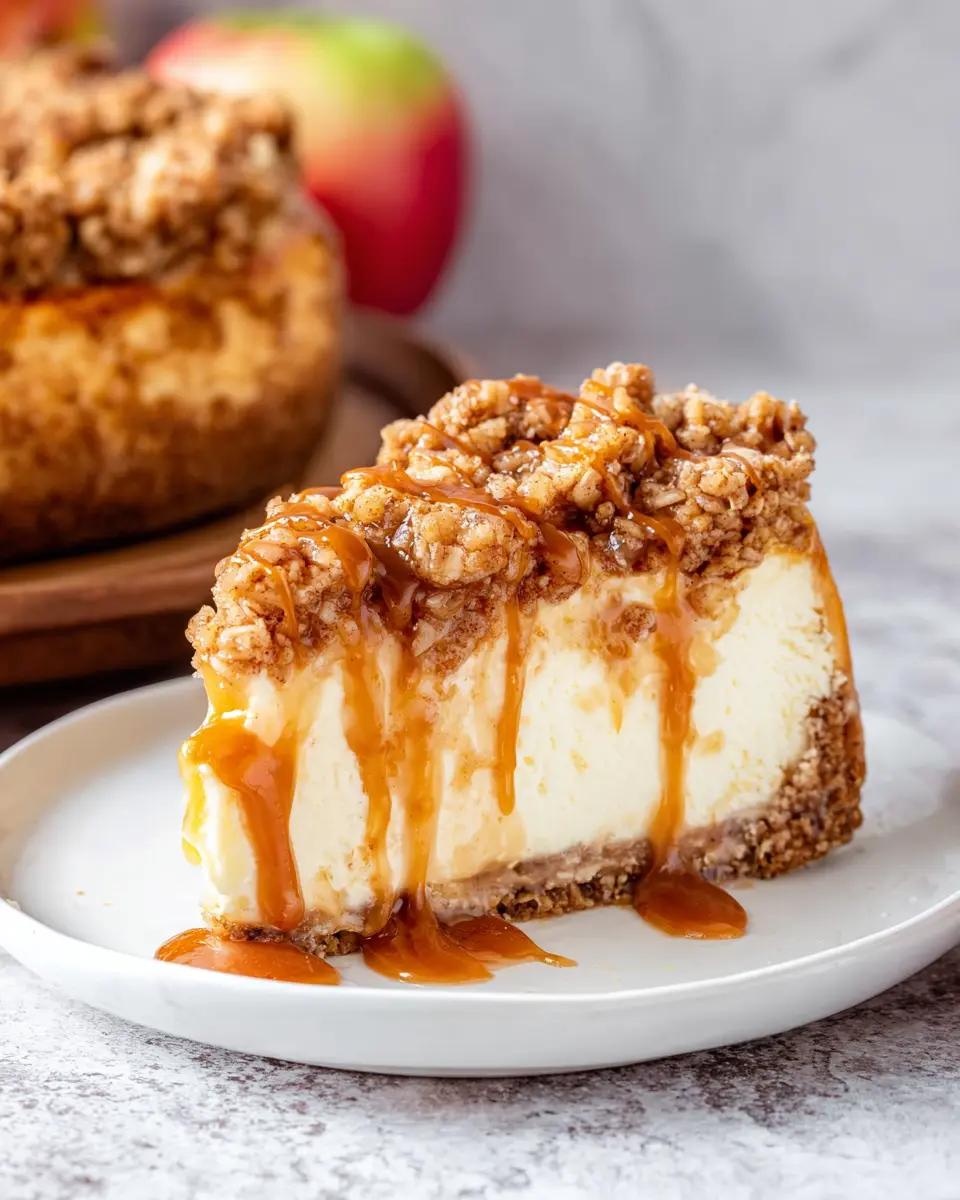
With everything prepped, it’s time to assemble! Pour the cheesecake batter over the baked crust and smooth out the top. Layer the chilled apples evenly over the cheesecake, and then generously sprinkle the oatmeal crisp topping on top.
For the baking, carefully place the springform pan into a large roasting pan, then pour boiling water around the cheesecake pan until it reaches about an inch high. This will create a moist environment ensuring a perfectly baked cheesecake. Bake for about 50-60 minutes or until you see a slight wobble in the center when gently moved.
Once the cheesecake is done, let it cool completely before transferring it to the fridge to set for at least 6 hours. Drizzle with salted caramel sauce for an extra touch of indulgence! Your Apple Crisp Cheesecake is ready to impress friends and family. Enjoy!
Variations on Apple Crisp Cheesecake
Caramel Apple Crisp Cheesecake
If you’re a fan of that irresistible combo of caramel and apples, this variation will take your dessert experience to new heights! Simply drizzle salted caramel sauce over the apple layer before adding the crumble topping. Bake as directed, and you'll enjoy bites of rich, gooey sweetness with each forkful. If you're looking for the ultimate indulgence, consider adding a bit of caramel to the cheesecake batter itself for extra depth of flavor.
Gluten-Free Apple Crisp Cheesecake
Catering to gluten sensitivities doesn't mean sacrificing flavor! For a gluten-free apple crisp cheesecake, swap out the graham cracker crust for a blend of almond flour and butter. This maintains the lovely texture while keeping things light and crispy. Use gluten-free oats for the topping, and you'll have a delightful dessert that everyone can enjoy. Check out this resource for more gluten-free tips and tricks!
No matter which variation you choose, you're sure to impress family and friends with this apple crisp cheesecake delight.
Baking Notes for Apple Crisp Cheesecake
Common Baking Pitfalls to Avoid
When making your apple crisp cheesecake, be mindful of overmixing the batter, as it can lead to cracks during baking. Another common mistake is not allowing your cream cheese to fully soften—this is crucial for a smooth filling. Lastly, avoid adding too much liquid from the apple mixture; excess moisture can make your cheesecake soggy.
Adjustments for Different Ovens
Every oven is a bit unique, so keep an eye on your cheesecake as it bakes. If your oven runs hot, consider reducing the temperature slightly or checking it a little earlier. Conversely, if it’s cooler, you might need to increase the baking time. Using an oven thermometer can help ensure accurate temperatures, so you nail that perfect apple crisp cheesecake texture every time!
For more baking tips, check out articles from reputable sources like America's Test Kitchen or King Arthur Baking, which offer expert advice on perfecting your baking skills.
Serving suggestions for Apple Crisp Cheesecake
Pairing with beverages
When it comes to enjoying your apple crisp cheesecake, consider serving it alongside a steaming cup of spiced chai or a classic cup of coffee. The warm flavors of cinnamon and nutmeg in these beverages beautifully complement the creamy richness of the cheesecake. For a refreshing twist, try pairing it with apple cider—either hot or cold—for a seasonal touch. You can also explore herbal teas, like chamomile or mint, which provide a soothing contrast to the dessert's sweetness.
Presentation tips for a beautiful slice
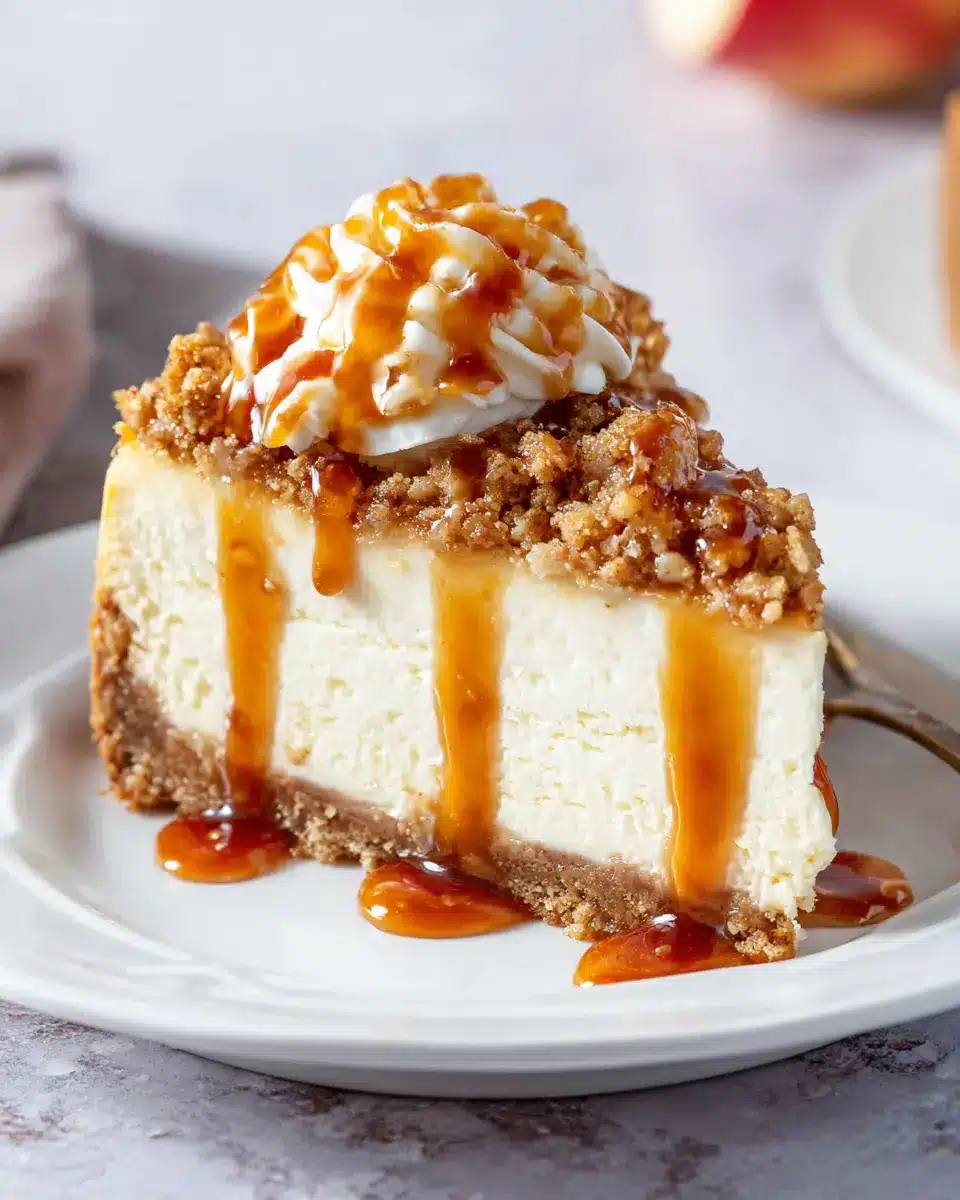
To create visually stunning slices of your apple crisp cheesecake, use a sharp, thin knife for clean cuts. Before each slice, dip the knife in hot water, then wipe it dry—this technique helps ensure neat edges. For an appealing presentation, plate each slice on a dessert dish, adding a drizzle of salted caramel on top and a sprinkle of cinnamon. Garnish with fresh apple slices or a dollop of whipped cream to elevate the look and flavor even further.
For more tips on dessert serving, check out this helpful article.
Tips for Making Perfect Apple Crisp Cheesecake
The Importance of Room Temperature Ingredients
Using room temperature ingredients is crucial for a smooth and creamy filling in your apple crisp cheesecake. Cold cream cheese can lead to lumps, making it hard to achieve that dreamy texture. Take your cream cheese, eggs, and sour cream out of the fridge at least 30 minutes before mixing. This simple step ensures easy blending and a velvety cheesecake. For more tips on achieving the right texture, you can check out this source.
Using a Water Bath for Optimal Texture
A water bath helps regulate the temperature while baking, preventing cracks in your cheesecake. To create a water bath, wrap your springform pan in foil and place it in a larger roasting pan filled with boiling water—about an inch deep. This technique promotes even baking and results in a luscious, custardy texture that pairs perfectly with the crisp topping. If you want to dive deeper into the science of baking cheesecakes, consult this article.
By following these tips, you're well on your way to a delicious apple crisp cheesecake that will wow your friends and family!
Time details for Apple Crisp Cheesecake
When planning to make this scrumptious apple crisp cheesecake, it helps to know the time commitment involved. Here's a quick overview to help you organize your baking schedule!
Preparation time
Set aside about 1 hour for the preparation. This includes making the crust, slicing the apples, and preparing the cheesecake filling. It’s a wonderful opportunity to enjoy some music or a podcast while you work!
Cooking time
The baking process takes approximately 55 minutes. While it may seem like a long time, the delicious aroma that fills your kitchen is worth every minute!
Total cooling and chilling time
After baking, allow for a total of 7 hours for cooling and chilling. This crucial step ensures that the cheesecake sets perfectly so you can enjoy its rich and creamy texture when you're ready to serve.
By breaking down the time involved, you can prepare your ingredients in advance and anticipate the delightful moment when you finally indulge in this apple crisp cheesecake. Happy baking!
Nutritional Information for Apple Crisp Cheesecake
Understanding the nutritional components of apple crisp cheesecake can help you make informed choices while indulging in this delightful dessert. Let's break it down:
Calories
Each slice of apple crisp cheesecake contains approximately 340 calories, making it a delicious treat to enjoy in moderation.
Protein
This creamy cheesecake packs in about 6 grams of protein per slice, thanks to the rich full-fat cream cheese. It’s a tasty way to incorporate a bit of protein into your dessert!
Sodium
A slice holds roughly 250 mg of sodium, so it’s a good idea to keep this in mind, especially if you’re watching your sodium intake.
For more detailed dietary information or adjustments to fit specific dietary needs, consider checking out resources like the USDA FoodData Central. Happy baking!
FAQs about Apple Crisp Cheesecake
What if I want to make it in advance?
Making apple crisp cheesecake in advance is a great idea! You can prepare it up to a day ahead. Just follow all the steps for baking, then allow it to cool and chill in the fridge overnight. This extra time not only helps the flavors meld but also makes it perfect for entertaining. When you’re ready to serve, just drizzle with some salted caramel for that finishing touch.
Can I freeze apple crisp cheesecake?
Absolutely! Freezing your apple crisp cheesecake is a fantastic option if you want to preserve it for later. Once it’s completely cooled, wrap it tightly in plastic wrap and place it in an airtight container. It can last up to three months in the freezer. When you're ready to enjoy it, just thaw it in the fridge overnight before serving.
How do I store leftovers?
To keep your leftovers fresh, simply cover the cheesecake with plastic wrap or transfer it to an airtight container. Stored this way, it should last about four to five days in the refrigerator. It's perfect for those late-night cravings or as a delightful treat for your weekend brunch!
Conclusion on Apple Crisp Cheesecake
Final thoughts on homemade indulgence
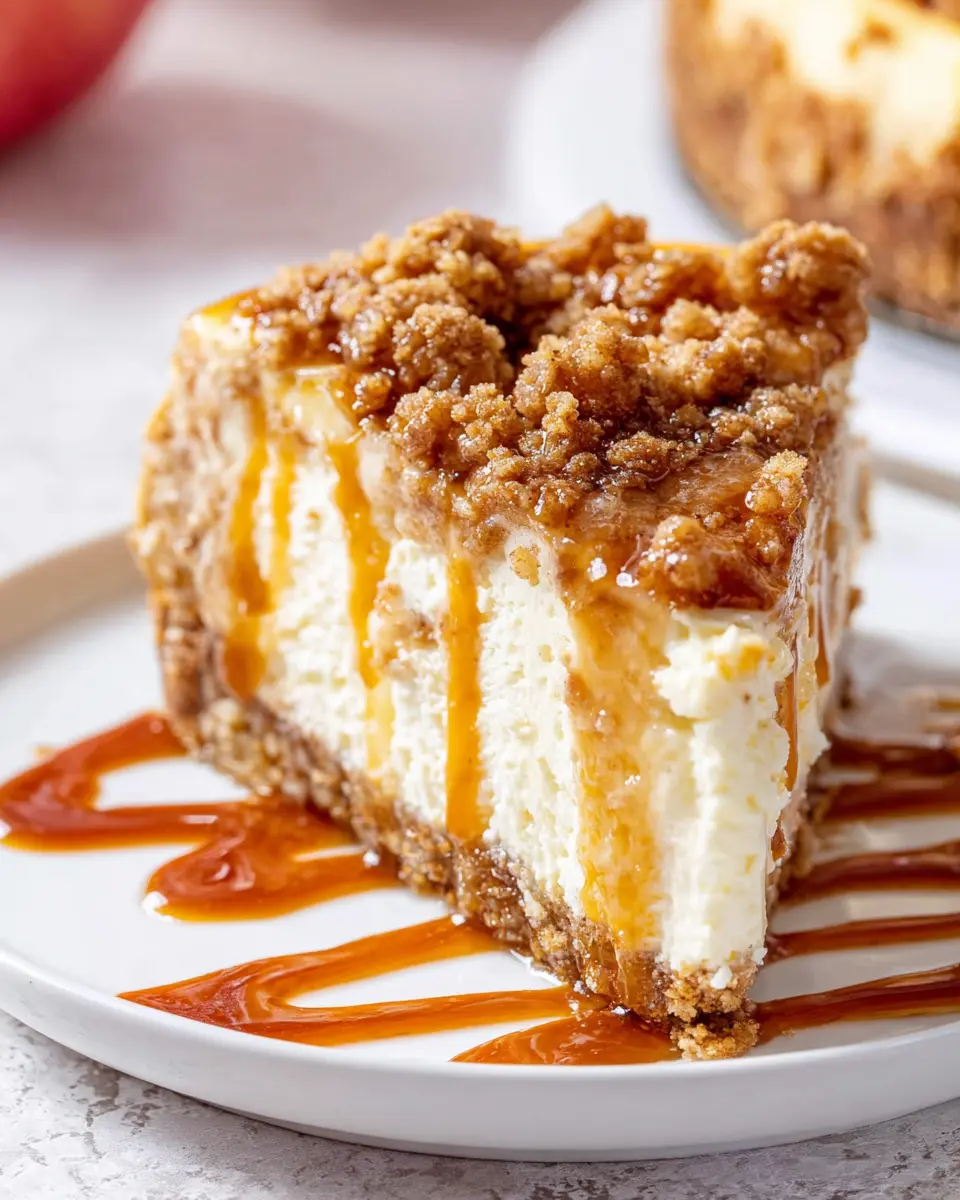
Creating apple crisp cheesecake is a delightful way to embrace the flavors of fall while impressing your friends and family. The combination of creamy cheesecake, spiced apples, and crunchy topping makes for an indulgent dessert that’s perfect for any occasion. Don’t hesitate—give this recipe a try! For more delicious dessert ideas, check out Serious Eats for inspiration.
Apple Crisp Cheesecake
Equipment
- 9-inch springform pan
- large roasting pan
Ingredients
Graham Cracker Crust
- 3 cups graham crumbs
- 3 tablespoons brown sugar
- ½ teaspoon cinnamon
- ½ cup unsalted butter melted
Cinnamon Apples
- 2 large apples I recommend Granny Smith or Gala
- 2 tablespoons brown sugar
- 1 ½ teaspoons cinnamon
Crisp Topping
- ½ cup all-purpose flour
- ½ cup brown sugar
- 1 teaspoon cinnamon
- ½ cup quick oats
- ¼ cup unsalted butter melted
Cheesecake Batter
- 24 ounces full-fat cream cheese room temperature
- ¾ cup granulated sugar
- ¼ cup brown sugar
- ½ teaspoon cinnamon
- 1 tablespoon cornstarch or 2 tablespoons all-purpose flour
- 1 teaspoon vanilla extract
- ½ cup sour cream room temperature
- 3 large eggs room temperature
- boiling water for the water bath
To Serve
- salted caramel sauce
Instructions
Preparation
- Preheat the oven to 350F (180C or 160C on a fan-forced oven).
- Wrap the outside of a 9-inch (23-cm) springform pan in tin foil so that the bottom and sides are covered. Wrap it at least 3-4 times so that all the seams are covered too. Lightly grease the pan with non-stick cooking spray.
Crust
- Mix the graham crumbs, brown sugar and cinnamon. Then mix in the melted butter.
- Press the mixture into the bottom and about ½ way up the sides of the pan.
- Bake in the preheated oven for 8-10 minutes. Remove from the oven and keep the oven turned on.
Cinnamon Apples
- Peel and core the apples. Slice into very thin slices.
- Toss the apples with the brown sugar and cinnamon. Place in the fridge until you'll need them later.
Crisp Topping
- Stir together the flour, brown sugar and cinnamon in a medium bowl until no lumps remain. Then mix in the oats.
- Stir in the melted butter. It should look like damp sand and form clumps/crumbles if you squeeze it in your palm. Set aside until you'll use it later.
Cheesecake Filling
- In a very large bowl, beat the cream cheese and sugars until smooth and creamy. Turn off the mixer and scrape down the sides and bottom of the bowl as needed.
- Mix in the corn starch and cinnamon. Then mix in the sour cream and vanilla extract. Again, turn off the mixer and scrape down the bowl to ensure there are no lumps of cream cheese.
- Mix in the eggs 1 at a time. Stop mixing as soon as the eggs are combined. You should no longer see pieces of egg yolk or egg white.
Assembling & Baking the Cheesecake
- With the pan still wrapped in foil, pour the cheesecake filling over the crust and smooth the top.
- Place sliced apples on top of the cheesecake in an even layer. Do not add any juice/liquid from the bottom of the bowl of your apples. You may not quite need all the apples to form an even layer.
- Sprinkle the oatmeal crumble mixture over the sliced apples. It may look like quite a bit, but it really isn't after the cheesecake is baked.
- Place the cheesecake inside a large roasting pan (the pan should still be wrapped in foil).
- Pour boiling water into the roasting pan so that there's about 1 inch of water in the pan.
- Place the roasting pan in the oven. Bake the cheesecake for about 50-60 minutes. When it's done baking, there should be a very slight wobble if you gently nudge the pan.
- Remove the cheesecake from the oven. Cool in the roasting pan until it reaches room temperature.
- Remove the cheesecake from the roasting pan. Cover the pan with tin foil and place in the fridge to set for at least 6 hours or overnight.
Serving
- When ready to serve, remove the cheesecake from the fridge.
- Trace around the edges with a sharp knife. Then unclamp the outer ring of the springform pan.
- Slice the cheesecake using a thin, sharp knife (not a table knife). Be sure to slice all the way through the crust. This recipe can be a little messy to slice, so don't worry if your pieces don't look perfect.
- Optionally, drizzle each piece with a little salted caramel.
Leave a Reply