
Introduction to Danish Butter Cookies that Melt in Your Mouth
Why Danish Butter Cookies?
Danish Butter Cookies are much more than just a sweet treat; they are a delightful embodiment of nostalgia and warmth. Commonly found in iconic blue tins during the holiday season, these melt-in-your-mouth cookies have been a traditional favorite for generations. Their rich buttery flavor combined with a light, airy texture creates a unique eating experience that can transport you back to childhood memories with every bite.
What makes these cookies special? They’re incredibly versatile! You can enjoy them plain, sprinkled with coarse sugar, or even jazz them up with colorful sprinkles for festive occasions. Their understated elegance makes them perfect for gifting or simply enjoying at home with a warm cup of tea or coffee. According to a survey by the National Confectioners Association, 56% of young adults say they love receiving baked goods as gifts, highlighting the universally cherished appeal of treats like Danish Butter Cookies.
So, why not whip up a batch of these delicious cookies that genuinely melt in your mouth? They’re simple to make and sure to impress friends and family alike—let's dive into the full recipe below and get started!
Ingredients for Danish Butter Cookies
Essential ingredients for melt-in-your-mouth cookies
Crafting the perfect Danish butter cookies that melt in your mouth requires a handful of essential ingredients, each contributing to that irresistible, buttery flavor and crumbly texture. Here’s what you’ll need:
- 1 cup (227 g) European salted butter: The star of the show! Using European butter is key due to its higher fat content, which enhances both flavor and texture.
- ½ cup (100 g) granulated sugar: This adds sweetness and helps achieve that lovely golden hue.
- ⅛ teaspoon salt: Just a pinch to balance the sweetness and elevate flavors — don’t skip this!
- 2 egg yolks: They add richness and help bind the dough for that perfect melt-in-your-mouth experience.
- 2 teaspoons (10 g) vanilla extract: A splash of this adds wonderful warmth and depth to your cookies.
- 1 tablespoon (15 g) whole milk: This helps soften the dough for easier piping, so adjust as needed!
- 2 cups (220 g) all-purpose flour and ½ cup (50 g) cake flour: This blend creates the ideal consistency for beautifully textured cookies.
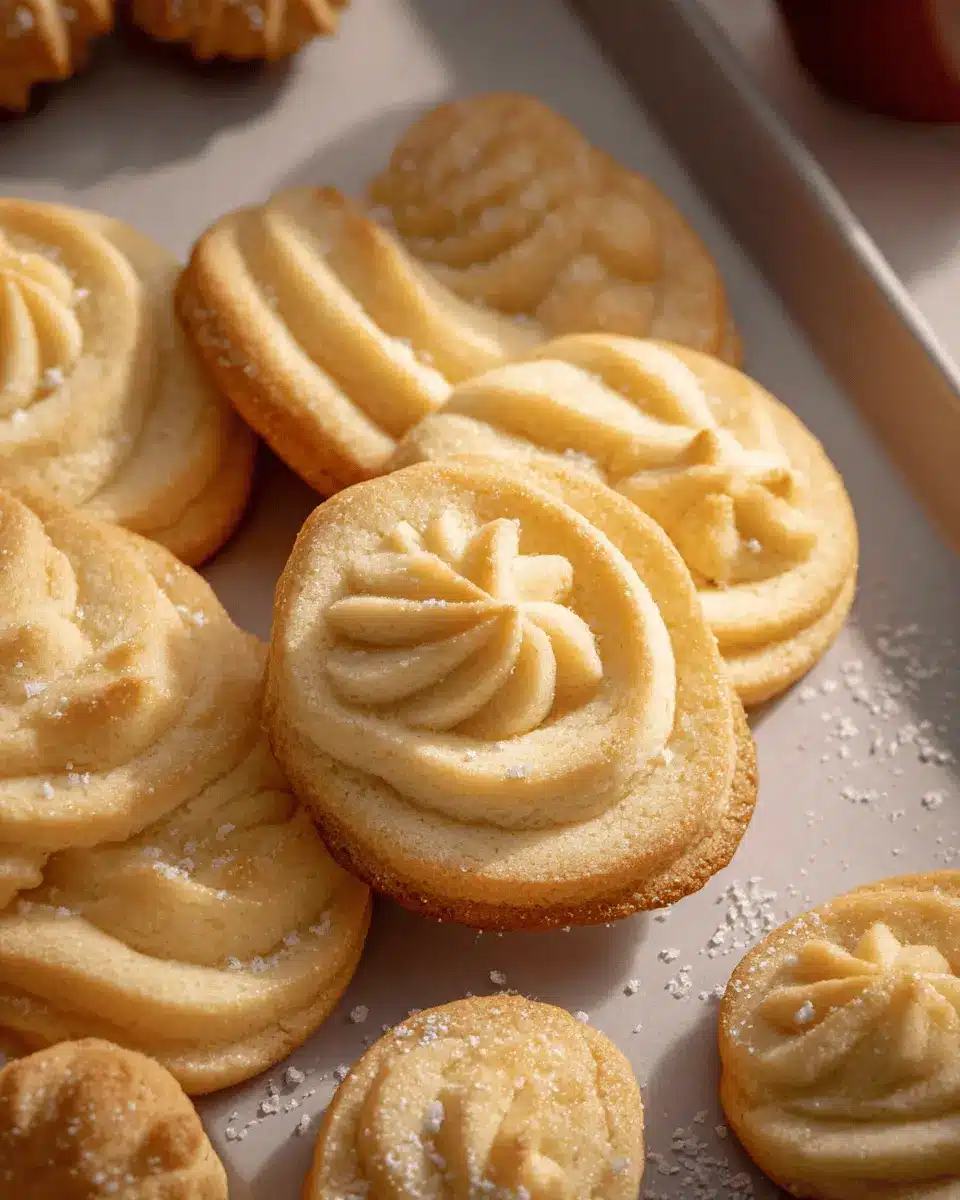
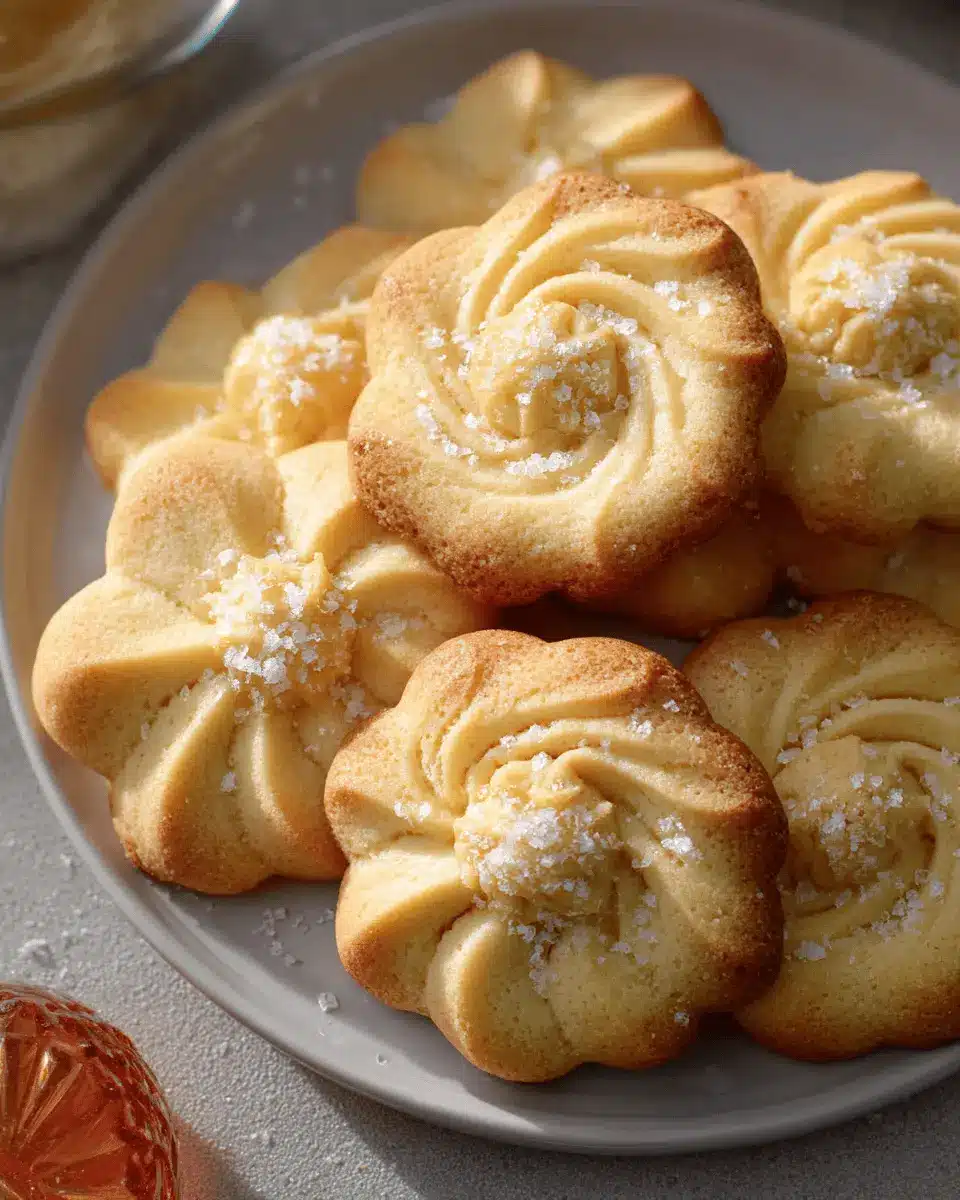
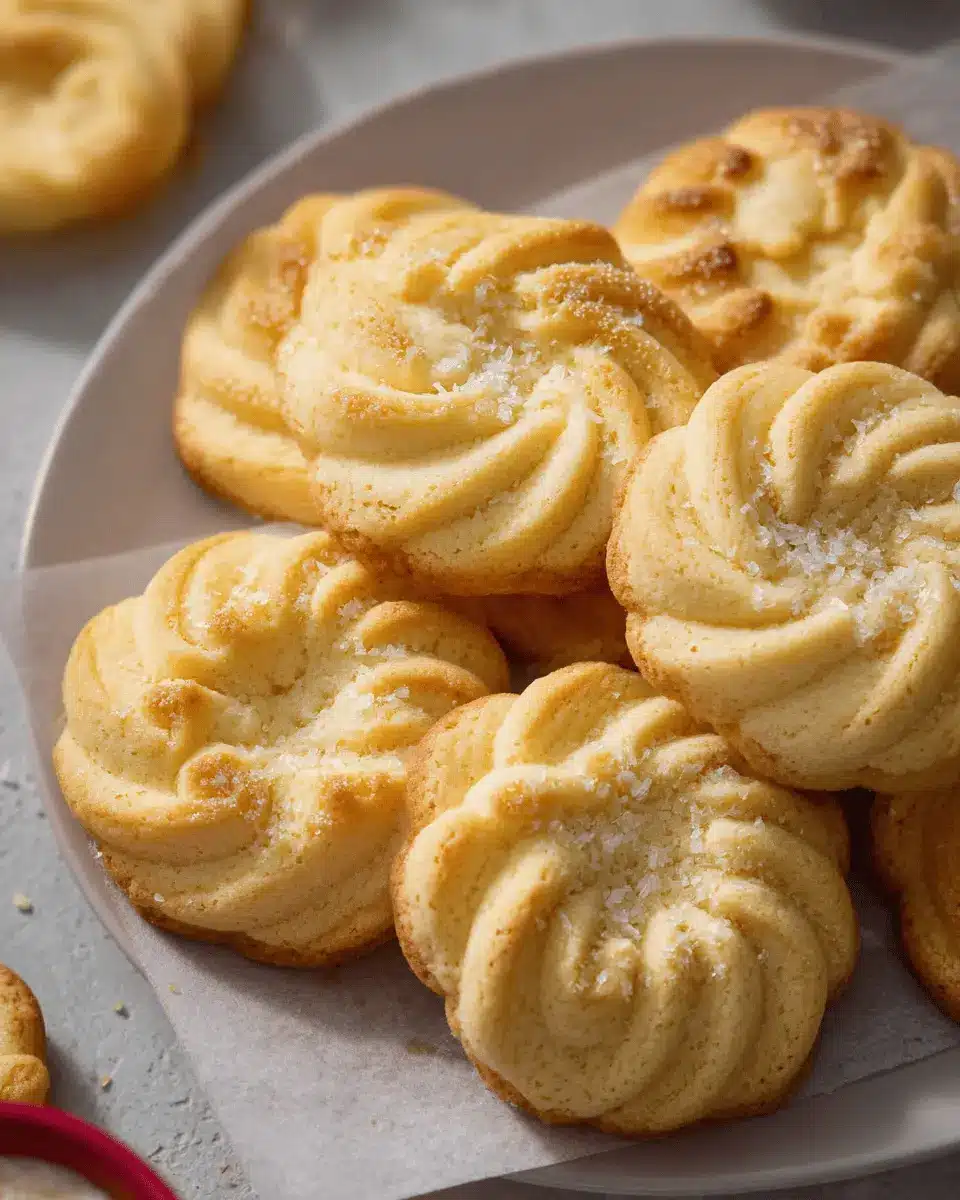
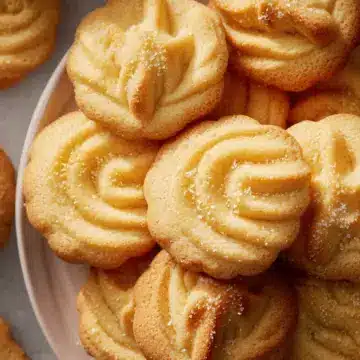
- Coarse sugar for decorating: A finishing touch that adds sparkle and crunch to your delightful cookies!
With these ingredients on hand, you’re well on your way to baking mouthwatering Danish butter cookies! For more tips on each ingredient, take a look at this helpful guide on butter varieties.
Preparing Danish Butter Cookies
Baking Danish Butter Cookies Melt in Your Mouth is a delightful experience, especially when surrounded by the warmth of your kitchen. Here’s a step-by-step guide to help you effortlessly create these delicious treats that will bring smiles to your friends and family!
Setup Your Baking Space
Before you dive into mixing and measuring, it’s crucial to set up your baking environment. Make sure to clear out a section in your refrigerator for the baking sheet, as chilling is key to preventing the cookies from spreading too much when baking. Line two baking sheets with parchment paper or silicone mats for easy cleanup. Trust me, this little prep will save you a headache later!
Cream the Butter and Sugar
In the heart of this process, start by creaming the butter, sugar, and salt together. Use a stand mixer fitted with a paddle attachment and mix the room-temperature butter on medium speed until it’s smooth and creamy. Gradually add in the granulated sugar and salt, mixing until the mixture looks light and fluffy. This stage is essential as it introduces air into the batter, making your cookies soft and tender.
Add Egg Yolks, Vanilla, and Milk
Once your butter and sugar are perfectly creamed, it’s time to add flavor. Incorporate the two egg yolks, vanilla extract, and a tablespoon of whole milk into the mixture. Continue to mix on medium speed until everything is thoroughly combined. Don’t forget to scrape down the sides of the bowl for a perfect blend! This step adds richness and a delightful aroma to your Danish butter cookies.
Mix Dry Ingredients and Combine
Now, let’s talk dry ingredients! In a separate bowl, whisk together the all-purpose flour and cake flour. Gradually add this flour mixture into your wet ingredients in two additions. Mix on low speed until just combined and be careful not to overmix! If your dough feels too stiff for piping, a bit more milk can help soften the consistency.
Pipe the Cookies onto Baking Sheets
Transfer your delightful cookie batter to a piping bag fitted with a large star tip. Pipe out 2-inch shapes—whether rosettes, pretzels, or simple circles—onto your prepared baking sheets. Make sure to space them at least two inches apart. For a festive touch, sprinkle some coarse sugar or colorful sprinkles on top. And remember to chill them for 20-30 minutes in the fridge; this will help them keep their shape while baking.
Bake to Perfection
Lastly, preheat your oven to 350°F to get ready for the magic. Place your chilly cookies in the middle rack and bake for 10-15 minutes, or until the edges are just lightly golden brown. Allow them to cool on the baking sheet for about 5 minutes before transferring to a wire rack. Ah, the sweet aroma of freshly baked Danish Butter Cookies—it’s unbeatable!
By following these straightforward steps, you’ll be well on your way to mastering the art of baking melt-in-your-mouth Danish butter cookies! Enjoy every crumb, and don’t forget to share with friends or family—they’ll be begging for the recipe!
Variations of Danish Butter Cookies
Classic Vanilla Twist
For a delightful take on the traditional recipe, try adding a splash of almond extract alongside the vanilla in your Danish Butter Cookies Melt in Your Mouth. This subtle twist enhances the flavor, creating a richer taste. You can also top these cookies with a light glaze of icing made from powdered sugar and milk for added sweetness. They make an ideal accompaniment to afternoon tea or coffee, elevating a simple snack into a delightful experience.
Chocolate-Dipped Version
To indulge a sweet tooth, consider the chocolate-dipped version of these classic cookies. Simply melt some high-quality chocolate and dip half of each cooled cookie into it. Once dipped, you can sprinkle crushed nuts or colorful sprinkles on top for an extra pop of flavor and texture. This not only adds a luscious layer but also transforms your Danish butter cookies into a stunning dessert perfect for parties or gatherings.
Whether you choose the classic vanilla twist or the indulgent chocolate-dipped option, you’re sure to impress your friends and family with these simple yet delicious variations!
Baking Notes for Danish Butter Cookies
Tips for Achieving the Perfect Texture
When crafting your Danish Butter Cookies that truly melt in your mouth, focus on these key tips:
-
Use Quality Ingredients: Opt for European salted butter for a richer flavor and easily spreadable consistency. Room temperature butter incorporates better, ensuring a light and airy texture.
-
Take Your Time: Cream the butter and sugar until light and fluffy. This step may feel tedious, but it introduces air into the mixture—vital for that dreamy texture.
-
Chill the Dough: Chilling your piped cookies for 20-30 minutes before baking prevents excess spreading, helping to maintain their shape and ideal chewiness.
Following these simple steps will lead your cookies to become a delightful treat everyone will remember! For insightful tips on baking techniques, check out King Arthur Baking.
Serving Suggestions for Danish Butter Cookies
Enjoy Them with Tea or Coffee
There’s something truly magical about savoring Danish Butter Cookies Melt in Your Mouth alongside a warm cup of tea or coffee. The rich, buttery flavor complements the drink perfectly, whether you prefer a robust espresso or a delicate herbal tea. For a delightful twist, consider pairing these cookies with a creamy latte or a fragrant chai for a cozy afternoon treat.
Perfect for Gifting
These melt-in-your-mouth cookies are also a wonderful gift! Present them in a charming tin or wrap them in festive cellophane, and you’ve got a thoughtful homemade gift that family and friends will adore. Customize the packaging to match the occasion, whether it’s a holiday party or a birthday celebration. For extra flair, you might even add a handwritten note or card, making your gift feel extra special.
For more creative gift ideas, check out this guide to homemade gifts.
Time Breakdown for Danish Butter Cookies
Understanding the time commitments for making these Danish Butter Cookies (Melt in Your Mouth) will help you plan your baking session efficiently. Here’s a quick summary:
Preparation Time
You’ll need about 15 minutes to gather your ingredients and mix everything together. This includes the fun parts, like creaming the butter and sugar!
Chilling Time
Don’t skip this step! Chill the piped cookies in the fridge for 20-30 minutes before baking. This prevents them from spreading too much while they bake.
Baking Time
Once chilled, your cookies will need about 10-15 minutes in the oven. Keep an eye on them so they achieve that perfect golden edge.
Total Time
From start to finish, expect around 1 hour and 30 minutes to have your delicious Danish Butter Cookies ready to enjoy!
Planning your baking helps ensure a smooth experience, and soon enough, you’ll have a delightful batch to savor or share. For ingredients you'll need, check out good sources like Bob's Red Mill for top-quality flours or King Arthur Baking for vanilla extract ideals. Happy baking!
Nutritional Facts for Danish Butter Cookies
Calories
Each delicate Danish butter cookie packs about 100 calories, making them a delightful treat without going overboard.
Sugars
With around 5 grams of sugar per cookie, these treats balance sweetness and buttery goodness perfectly, making them ideal for those festive moments.
Saturated Fat
Containing about 5 grams of saturated fat, the richness of the European salted butter contributes to their melt-in-your-mouth texture. Just remember to enjoy in moderation!
These delectable cookies truly embody the spirit of celebration and coziness. Whether you’re making them for the holidays or as a special gift, understanding their nutritional profile helps you savor every bite while planning your treats. Interested in learning more about healthy baking substitutions? Check out resources like Healthline for tips on reducing sugar or fat content in your desserts!
FAQs about Danish Butter Cookies
How do I make my cookies even more melt-in-your-mouth?
To elevate the melt-in-your-mouth experience of your Danish butter cookies, consider using high-quality European butter. This butter typically has a higher fat content, which contributes to a richer flavor and a more delicate texture. Also, try incorporating cornstarch into the flour mix; even a tablespoon can work wonders, giving your cookies an even softer bite.
Can I freeze Danish Butter Cookies?
Absolutely! These Danish butter cookies freeze beautifully. Just ensure they’re completely cooled before placing them in an airtight container. For best results, separate layers of cookies with parchment paper. You can freeze them for up to three months, allowing you to enjoy these delightful treats anytime you crave a sweet nibble or need a last-minute gift.
What substitutes can I use for butter?
If you’re looking for alternatives to butter, try using coconut oil or vegan butter for a dairy-free option. Although these may slightly alter the flavor and texture, they can still produce delightful results. For a rich mouthfeel similar to butter, consider using ghee, which also allows for a deeper flavor profile while remaining lactose-free.
Explore more about cookie textures and variations in our other baking articles!
Conclusion on Danish Butter Cookies
Final thoughts and encouragement to try the recipe!
Danish butter cookies that melt in your mouth bring warmth and nostalgia to your kitchen. As you bake these delightful treats, you'll not only fill your home with irresistible aromas but also create beautiful memories. So, gather your ingredients and give this recipe a try—you won’t regret it! Share your baking experiences and let us know how your cookies turned out!
Danish Butter Cookies (Melt in Your Mouth)
Equipment
- Stand Mixer
- baking sheets
- parchment paper
- piping bag
Ingredients
- 1 cup European salted butter room temperature
- ½ cup granulated sugar
- ⅛ teaspoon salt
- 2 teaspoons vanilla extract
- 1 tablespoon whole milk or more to soften
- 2 cups all-purpose flour
- ½ cup cake flour
- coarse sugar for decorating
Instructions
- Make space in the refrigerator and prep the baking mats. Make room in your refrigerator for a baking sheet so the shaped cookies can chill for 20-30 minutes. Without chilling, the piped cookies may over-spread. Line two baking sheets with parchment paper or a silicone baking mat. Set aside.
- Cream butter, sugar salt. In the bowl of a stand mixer fitted with a paddle attachment, cream butter on medium speed until smooth. With the mixer still running on low, slowly add in sugar and salt. Mix on medium speed until light and fluffy.
- Incorporate egg yolks, vanilla, and milk. While mixing, add egg yolks, vanilla, and milk. Continue to mix on medium speed until well combined. Scrape down the sides of the bowl for thorough mixing.
- Mix dry ingredients and add into mixture. In a medium-sized mixing bowl, whisk the flour, and cake flour. Add flour mixture to mixer in two additions, and scrape down the sides of the bowl. Mix on low speed until combined and no traces of flour. If the batter is too thick to pipe, add another tablespoon of milk to soften.
- Pipe the cookies. Transfer cookie batter to a large piping bag with fitted a ½-inch open star tip. Pipe 2-inch cookies (rosettes, pretzels, circles, squares) on a prepared baking sheet. Space cookies at least 2-inches apart. If desired, sprinkle the dough with festive sprinkles and/or coarse sugar. Chill in the refrigerator for 20-30 minutes.
- Prepare the oven. Preheat oven to 350°F. Make sure the baking rack is in the middle of the oven.
- Bake. Bake for 10-15 minutes or until the edges are JUST lightly golden brown. Let cookies cool on the baking sheet for about 5 minutes before transferring to a wire rack to cool to room temperature.

Leave a Reply