
Introduction to Sweet and Sour Chicken
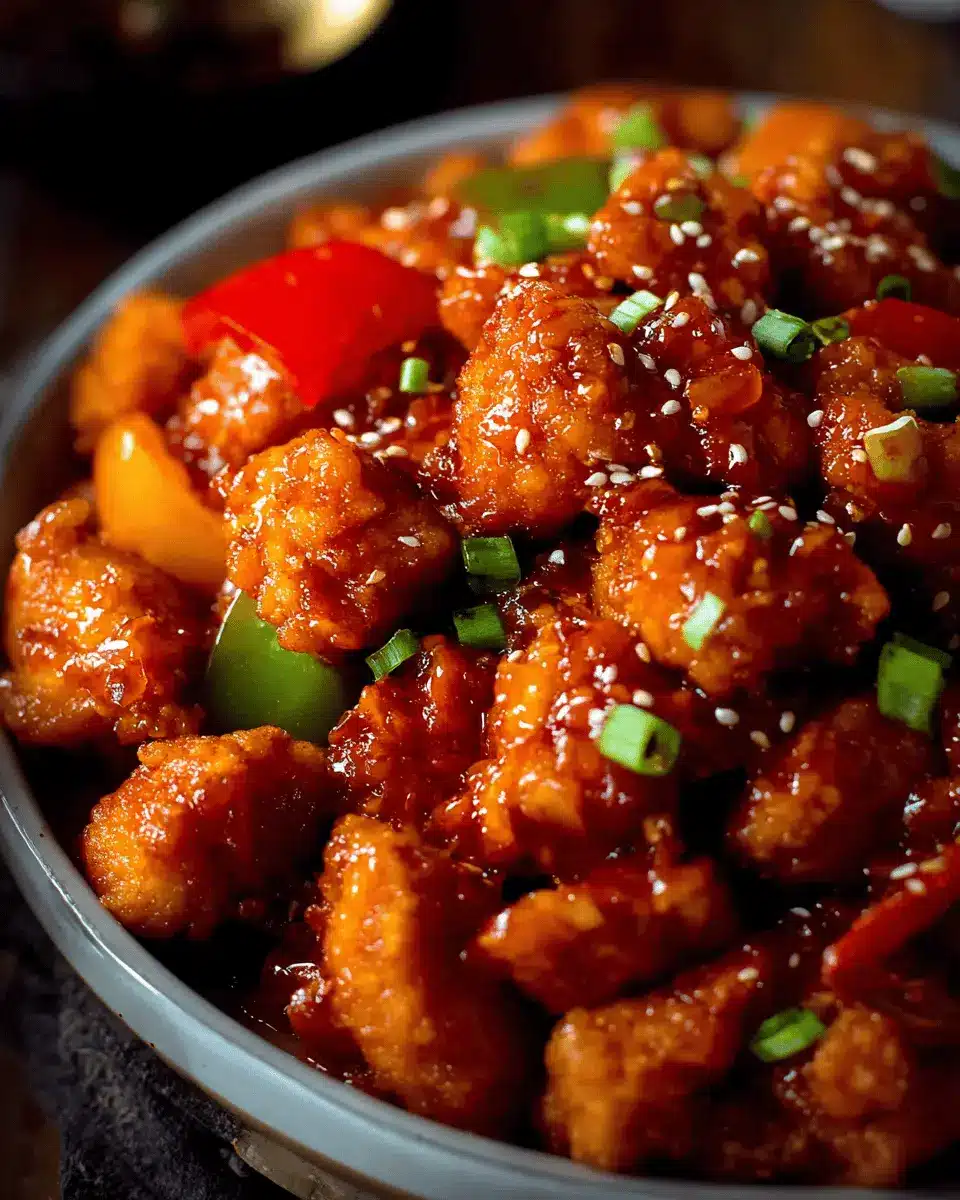
Sweet and Sour Chicken is a beloved dish that perfectly balances sweetness with a delightful tang, making it a hit among food lovers of all ages. But why settle for takeout when you can craft this delicious meal right in your own kitchen? Making homemade sweet and sour chicken is a game-changer for several reasons!
First, preparing this dish at home allows you to control the ingredients. You can choose fresh vegetables, premium chicken, and adjust the sweetness to match your preferences. Furthermore, the sauce is simple to whip up, using common pantry staples like ketchup and pineapple juice, which means you can enjoy a burst of flavor without inconvenient shopping trips.
Homemade sweet and sour chicken is not only delicious; it brings a sense of accomplishment as you create a restaurant-worthy meal in just 25 minutes. Picture yourself in the kitchen, tossing crispy chicken chunks in the pan while the gorgeously vibrant sauce simmers. Plus, studies show that cooking at home can lead to healthier choices and even save you money!
Ready to dive into this delectable dish? Let’s break down the recipe that will make your taste buds dance!

Ingredients for Sweet and Sour Chicken
Essential ingredients for the crispy chicken
To create that deliciously crispy chicken texture that everyone loves, you'll need a few key ingredients. Start with:
- 5 tablespoon vegetable oil: This will help fry the chicken to perfection.
- 2 eggs, lightly beaten: Acts as a binding agent for the coating.
- 3 tablespoon cornflour (cornstarch): Provides that signature crunch.
- 90 g (¾ cup) plain flour (all-purpose flour): Used for dredging.
- ½ teaspoon salt, ½ teaspoon pepper, ½ teaspoon garlic salt: These seasonings elevate the flavor.
- 2 teaspoon paprika: Adds a touch of heat and color.
- 3 skinless chicken breast fillets, chopped into bite-size chunks: The star of your Sweet and Sour Chicken dish.
The perfect homemade sauce components
Now, let’s whip up the sweet and tangy sauce that coats your crispy chicken. Gather the following:
- 1 tablespoon vegetable oil: For sautéing the vegetables.
- 1 large onion, peeled and chopped into large chunks
- 1 red pepper and 1 green pepper, chopped into 1-inch pieces
- 2 cloves of garlic, peeled and chopped: Essential for depth of flavor.
- 1 teaspoon minced ginger: Gives a fragrant kick.
- 150 ml (⅔ cup) tomato ketchup: Forms the base of your sauce.
- 2 tablespoon malt vinegar: Adds that necessary tanginess.
- 6 tablespoon dark brown muscovado sugar: Balances the flavors with sweetness.
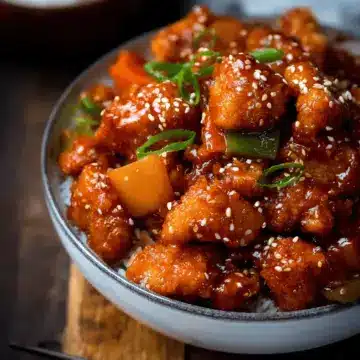
- 475 g (17 oz) canned pineapple chunks in juice: For a fruity twist that screams sweet and sour!
With these ingredients in hand, you're well on your way to an amazing homemade Sweet and Sour Chicken. Happy cooking!
Preparing Sweet and Sour Chicken
Making your own Sweet and Sour Chicken at home can be a fun and rewarding experience, not to mention a delicious one! Let’s dive into the preparation step by step, ensuring that you create a delightful, crispy dish packed with flavor.
Gather your ingredients
Before you start cooking, take a moment to round up your ingredients. It’s always easier to have everything at hand. You’ll need:
- Chicken: 3 skinless chicken breast fillets, chopped into bite-sized chunks
- Coating: Cornflour (cornstarch), plain flour, salt, pepper, garlic salt, and paprika
- Vegetables: 1 large onion, 1 red pepper, 1 green pepper, and garlic
- Sauce Ingredients: Tomato ketchup, malt vinegar, dark brown muscovado sugar, and canned pineapple chunks
- Oil: Vegetable oil for frying
For more details on each ingredient, you can check out this resource.
Coat the chicken pieces
Now that you have everything gathered, prepare your chicken for frying. Place the cornflour in one shallow bowl, and in a separate bowl, beat your eggs. In another bowl, mix the plain flour with salt, pepper, garlic salt, and paprika. This mix adds a burst of flavor to your chicken!
- Start by dredging each chicken piece in cornflour, followed by dipping in the beaten egg, and finally coating it in the seasoned flour. Make sure each piece is nicely coated for the ultimate crispiness.
Fry the chicken until crispy
Heat up your vegetable oil in a wok or large frying pan until it’s nice and hot—this is key for a crispy texture! Carefully add the coated chicken chunks, ensuring you don’t overcrowd the pan. Fry them for about 6-7 minutes, turning occasionally until they are golden brown and cooked through. If you want to ensure perfection, check the internal temperature with a cooking thermometer (target 165°F/74°C). Once done, transfer the chicken onto a paper towel-lined bowl to absorb any excess oil.
Sauté the veggies for a flavor boost
While your chicken is frying, you can prep your vegetables. In a large skillet, heat a tablespoon of oil over medium-high heat. Toss in the chopped onion and peppers, cooking for about 3 minutes until the onions become translucent. This step adds depth to your Sweet and Sour Chicken because the veggies soak up the delicious oil and flavor.
- After the veggies have softened, add in minced garlic and ginger, cooking for an additional minute for that aromatic touch.
Combine chicken and sauce for a delightful finish
Now for the pièce de résistance! In the same pan, pour in the beautiful sauce made from a mix of ketchup, vinegar, dark brown sugar, and the pineapple chunks (juice included). Bring the mixture to a gentle boil, allowing it to thicken slightly (about 3-5 minutes).
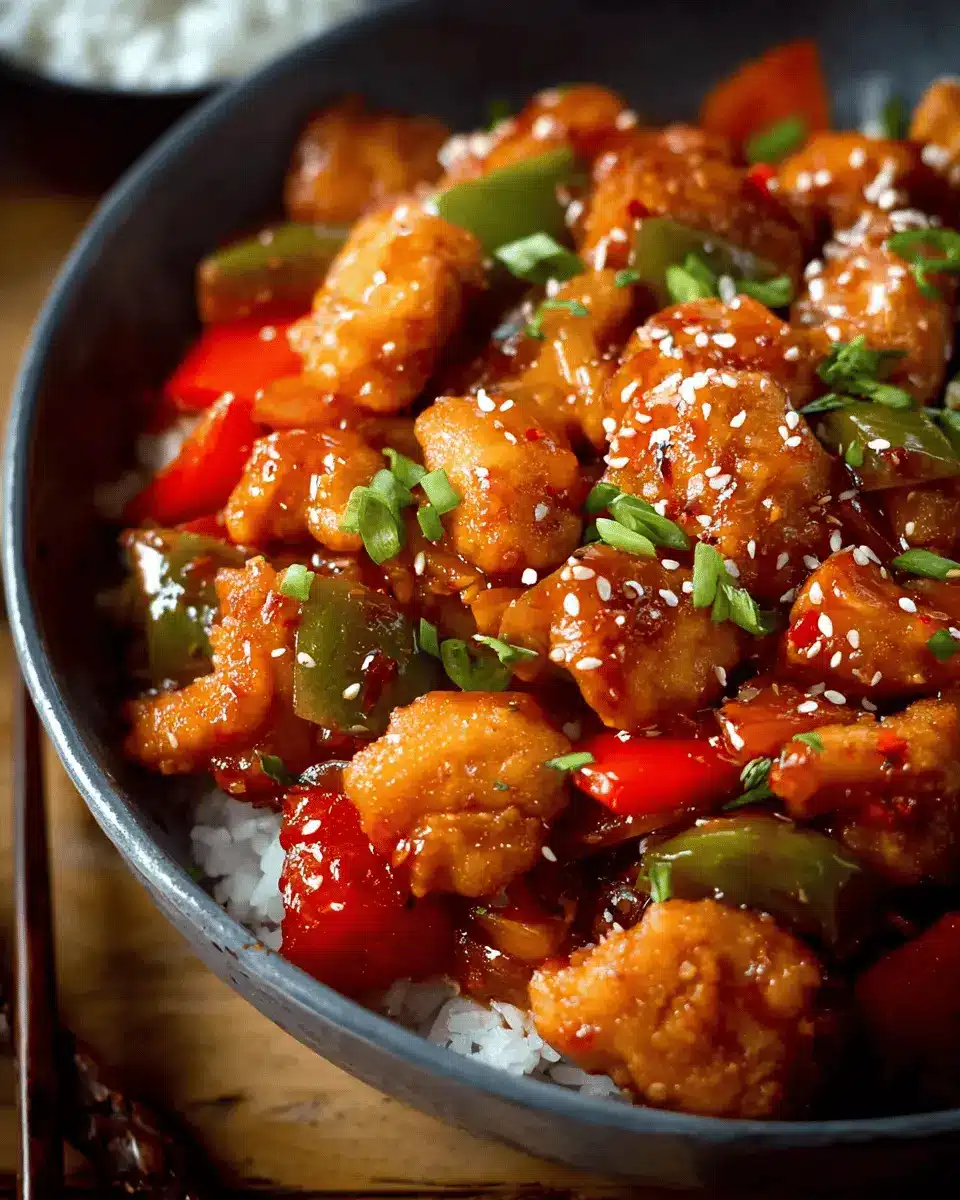
Once your sauce is ready, gently fold in the crispy chicken. Give it a toss to ensure everything is beautifully coated in the vibrant sauce. Serve your Sweet and Sour Chicken over rice—be it egg fried or boiled—sprinkled with sesame seeds for an elegant touch.
With these steps, you’re well on your way to impressing everyone at your dinner table! Enjoy!
Variations on Sweet and Sour Chicken
Tropical Twist with Mango
Looking to add a touch of the tropics to your Sweet and Sour Chicken? Consider incorporating ripe mango into the mix! Just toss diced mango in with the vegetables during the last few minutes of cooking for a burst of flavor that contrasts beautifully with the tangy sauce. Not only does this brighten your dish visually, but it also adds a lovely sweetness that pairs exceptionally well with the savory chicken.
Vegetarian Option with Tofu
For those craving a Sweet and Sour Chicken experience without meat, why not try tofu instead? Firm tofu, when marinated and cooked until crispy, absorbs the flavors of the sauce wonderfully. Simply replace chicken with cubed tofu and follow the same preparation method. This plant-based alternative not only satisfies vegetarians but also makes for a deliciously hearty meal that's lighter on the palate! For more tips on cooking with tofu, check out The Kitchn.
With these variations, you’re sure to impress your dinner guests or simply treat yourself to a delightful twist on a classic dish!
Cooking Tips and Notes for Sweet and Sour Chicken
How to Achieve the Crispiest Chicken
To get that unbeatable crunch on your chicken, ensure your oil is piping hot before adding the coated pieces. This helps to seal in moisture while creating a delightful crust. Dust your chicken in cornflour first—this adds extra crispiness—and make sure the egg wash coats every piece thoroughly before dredging in seasoned flour. For added texture, double-dip the chicken in the egg and flour mix!
Timing Your Veggies for Optimal Crunch
For your Sweet and Sour Chicken, timing is essential! Start with onions, as they take a bit longer to soften. After a few minutes, toss in your peppers; they're best when they retain a slight bite. Cooking them just until they're tender yet still crisp is key to a perfect balance in your dish. Remember, the goal is to complement that crispy chicken, so keep them vibrant and crunchy!
Ready to elevate your cooking? Check out this guide on perfect frying for more tips!
Serving suggestions for Sweet and Sour Chicken
Best rice pairings for your dish
When enjoying your Sweet and Sour Chicken, nothing complements it quite like a wholesome serving of rice. Here are some top choices:
- Egg fried rice: The eggs add a richness, balancing the sweetness of the dish.
- Boiled jasmine rice: Its subtle aroma enhances the flavors without overpowering them.
- Coconut rice: For a tropical twist, consider cooking your rice with coconut milk–it pairs beautifully with the tangy sauce.
Fun sides to elevate your meal
To round out your dinner experience, add some vibrant sides. Here are a few ideas:
- Stir-fried vegetables: Crisp, colorful veggies bring crunch and nutrition to each bite.
- Spring rolls: These can be a delightful starter or a fun sidekick to your meal.
- Asian slaw: A crunchy cabbage salad with a tangy dressing can add a fresh twist.
Incorporating these ideas can elevate your Sweet and Sour Chicken night from good to unforgettable! For more inspiration, check out this article on side dishes for great pairings.
Time Breakdown for Sweet and Sour Chicken
Preparation Time
The prep time for this Sweet and Sour Chicken is a swift 10 minutes. It's all about gathering your ingredients and getting everything ready for cooking. Feel free to put on your favorite playlist to make this time even more enjoyable!
Cooking Time
Cooking this delicious dish takes about 15 minutes. In this quick phase, you'll experience the magic of transforming raw ingredients into a mouthwatering meal. Keep an eye on the chicken to ensure it cooks perfectly!
Total Time
In just 25 minutes, you can serve up a plate of homemade Sweet and Sour Chicken that rivals any takeout. This timing makes it perfect for busy weeknights or last-minute dinner plans. Enjoy every bite knowing you prepared it with love and ease!
For more kitchen tips and tricks, check out the Kitchen Sanctuary for great insights and recipes.
Nutritional Facts for Sweet and Sour Chicken
Calories per serving
Each serving of Sweet and Sour Chicken contains approximately 350 calories, making it a satisfying and fairly light dinner option that won't tip the scales.
Protein content
This delicious dish provides about 30 grams of protein per serving, courtesy of the chicken. It's a fantastic way to fuel your body, especially after a long workday!
Sodium levels
While flavorful, this dish does have a sodium content of around 750 mg per serving. If you're watching your sodium intake, consider using low-sodium soy sauce or adjusting the amount of added salt.
For more healthy eating tips, check out this resource on Nutritional Guidelines from the Academy of Nutrition and Dietetics.
FAQs about Sweet and Sour Chicken
How can I make my chicken crunchier?
To achieve that perfect crunchy texture in your Sweet and Sour Chicken, consider double-coating your chicken. After dredging the chicken pieces in cornflour and egg, return them to the cornflour for another dip before frying. This extra layer helps to seal in moisture and adds more crunch. Additionally, frying at a higher temperature will create a crispy outer layer, so make sure your oil is hot enough!
Can I freeze leftover sweet and sour chicken?
Absolutely! You can freeze your leftover Sweet and Sour Chicken. Just allow it to cool completely, then store it in an airtight container or a heavy-duty freezer bag. It can be kept in the freezer for up to three months. When you’re ready to enjoy it again, thaw it in the fridge overnight and reheat it in the oven or on the stovetop for the best texture.
What other sauces can complement sweet and sour chicken?
If you're feeling adventurous, several other sauces can elevate your Sweet and Sour Chicken. Consider trying teriyaki, orange, or even a honey garlic sauce for a unique twist. These flavors pair wonderfully and can bring a whole new dimension to this beloved dish! For more sauce ideas, check out this list of popular Asian sauces.
Conclusion on Sweet and Sour Chicken
In conclusion, Sweet and Sour Chicken brings together vibrant flavors and satisfying textures for a delightful meal any night of the week. With its combination of crispy chicken and tangy sauce, this dish is not just easy to make but is sure to impress family and friends alike!
Sweet and Sour Chicken
Equipment
- wok
- large frying pan
Ingredients
- 5 tablespoon vegetable oil
- 2 pieces eggs lightly beaten
- 3 tablespoon cornflour (cornstarch)
- 90 g plain flour (all-purpose flour)
- 0.5 teaspoon salt
- 0.5 teaspoon pepper
- 0.5 teaspoon garlic salt
- 2 teaspoon paprika
- 3 pieces skinless chicken breast fillets chopped into bite-size chunks
Sauce
- 1 tablespoon vegetable oil
- 1 large onion peeled and chopped into large chunks
- 1 piece red pepper chopped into 1 inch pieces
- 1 piece green pepper chopped into 1 inch pieces
- 2 cloves garlic peeled and chopped/crushed
- 1 teaspoon minced ginger
- 150 ml tomato ketchup
- 2 tablespoon malt vinegar
- 6 tablespoon dark brown muscovado sugar
- 475 g canned pineapple chunks in juice
To Serve
- egg fried rice or boiled rice
- 1 teaspoon sesame seeds
Instructions
- Heat the oil in a wok or large frying pan until very hot.
- Whilst the oil is heating, place the egg in one shallow bowl and the cornflour in another shallow bowl. Add the flour, salt, pepper, garlic salt and paprika to another shallow bowl and mix together.
- Dredge the chicken in the cornflour, then dip it in the egg (make sure all of the chicken is covered in egg wash), and finally dredge it in the seasoned flour. Repeat until you've coated all the chicken.
- Add to the wok and cook on a high heat for 6-7 minutes, turning two or three times during cooking, until well browned. You may need to cook in two batches.
- Check the chicken is cooked and remove from the pan and place in a bowl lined with kitchen towels.
- Whilst the chicken is cooking, you can start on your sauce.
- Add the oil to a large frying pan/skillet, heat it up on a medium-to-high heat and add in the onions and the peppers. Cook for 3 minutes, stirring every now and then, until the onions start to go translucent.
- Add in the garlic and ginger and cook for another minute.
- Add the tomato ketchup, vinegar, dark brown sugar, and the tinned pineapple (including the juice) and stir. Bring to the boil, and then turn down the heat and let it bubble, stirring every so often, until slightly thickened, which should take 3-5 minutes.
- Transfer the cooked crispy chicken to the pan with the sauce and gently toss to coat.
- Serve with boiled or fried rice and a sprinkling of sesame seeds.
Leave a Reply