
Introduction to Yaki Onigiri
What are Yaki Onigiri?
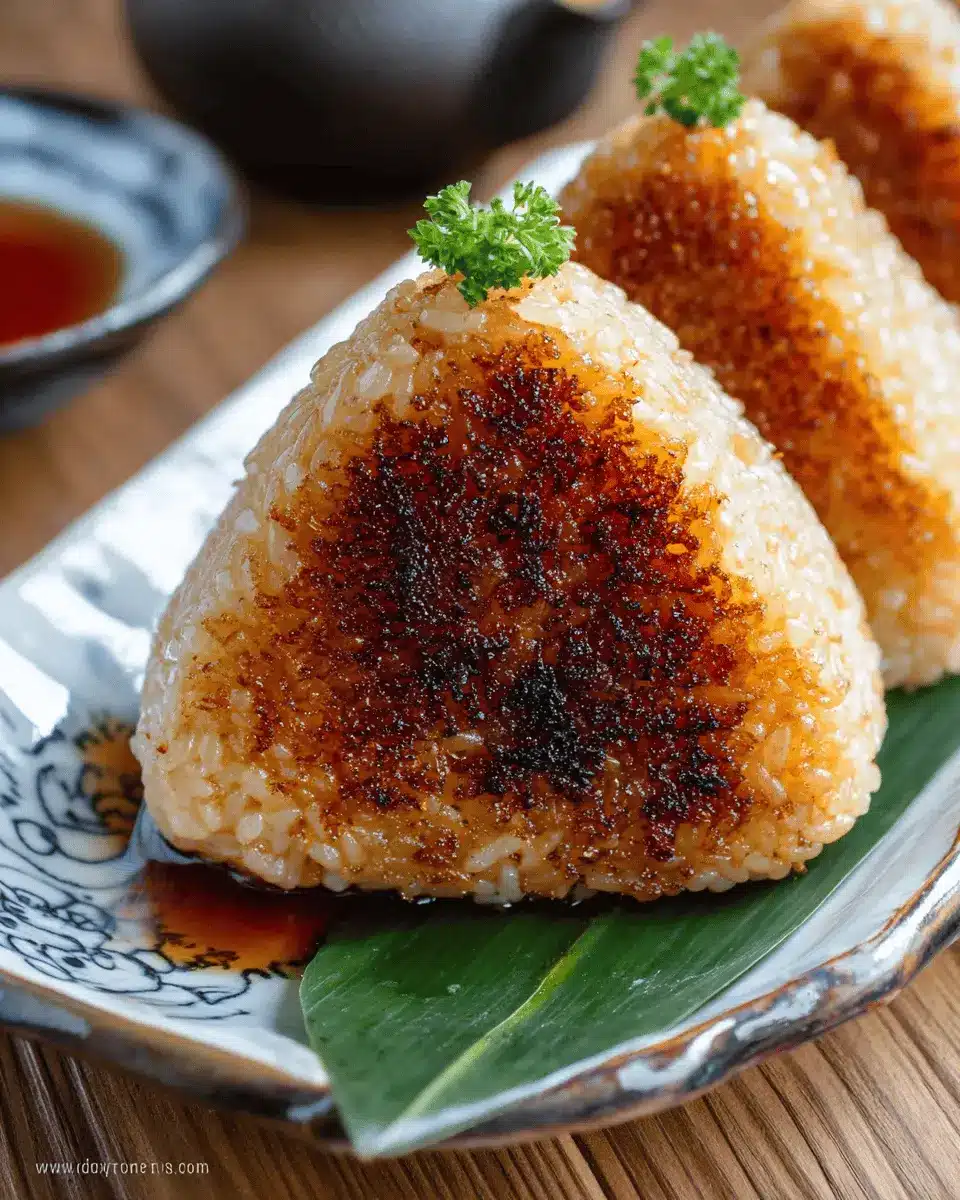
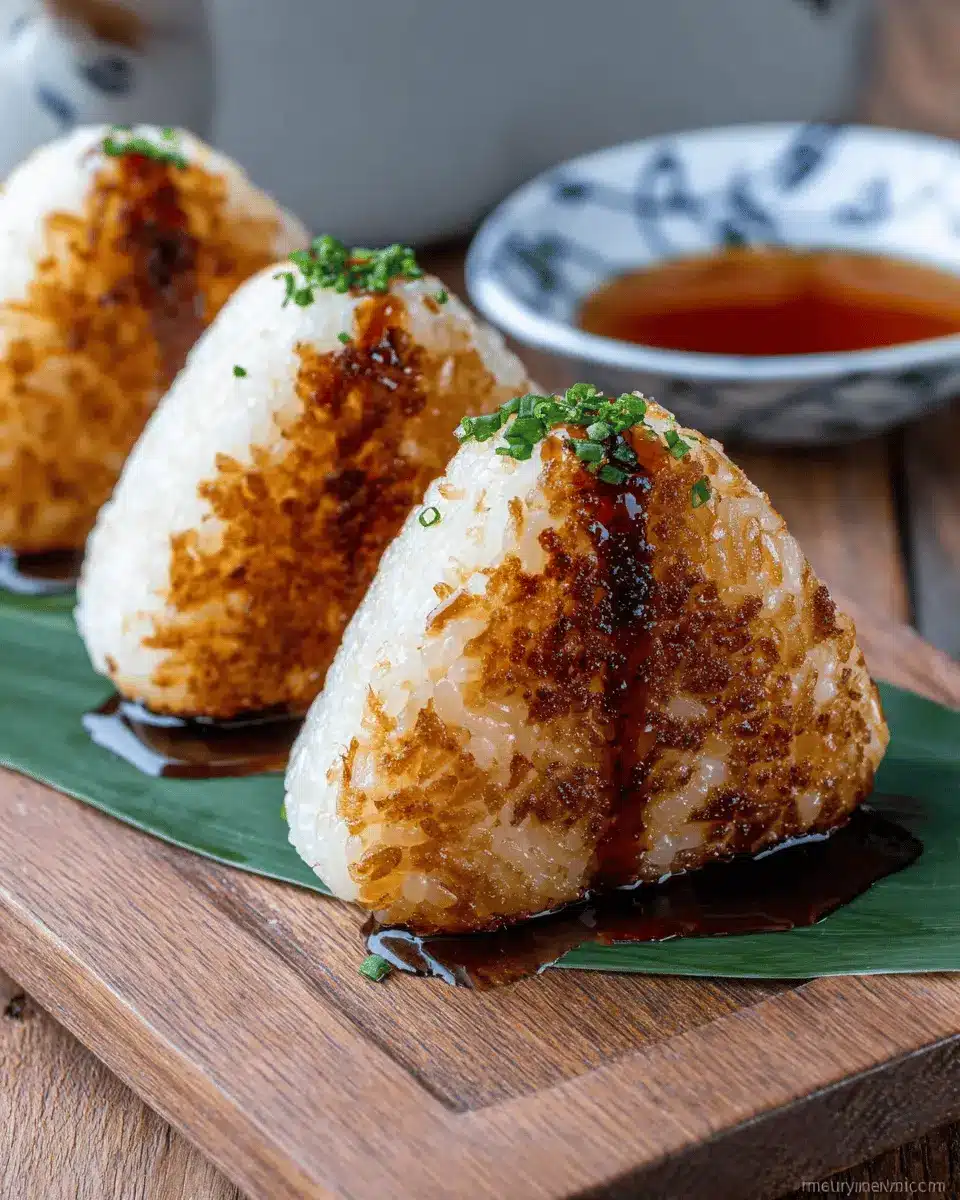
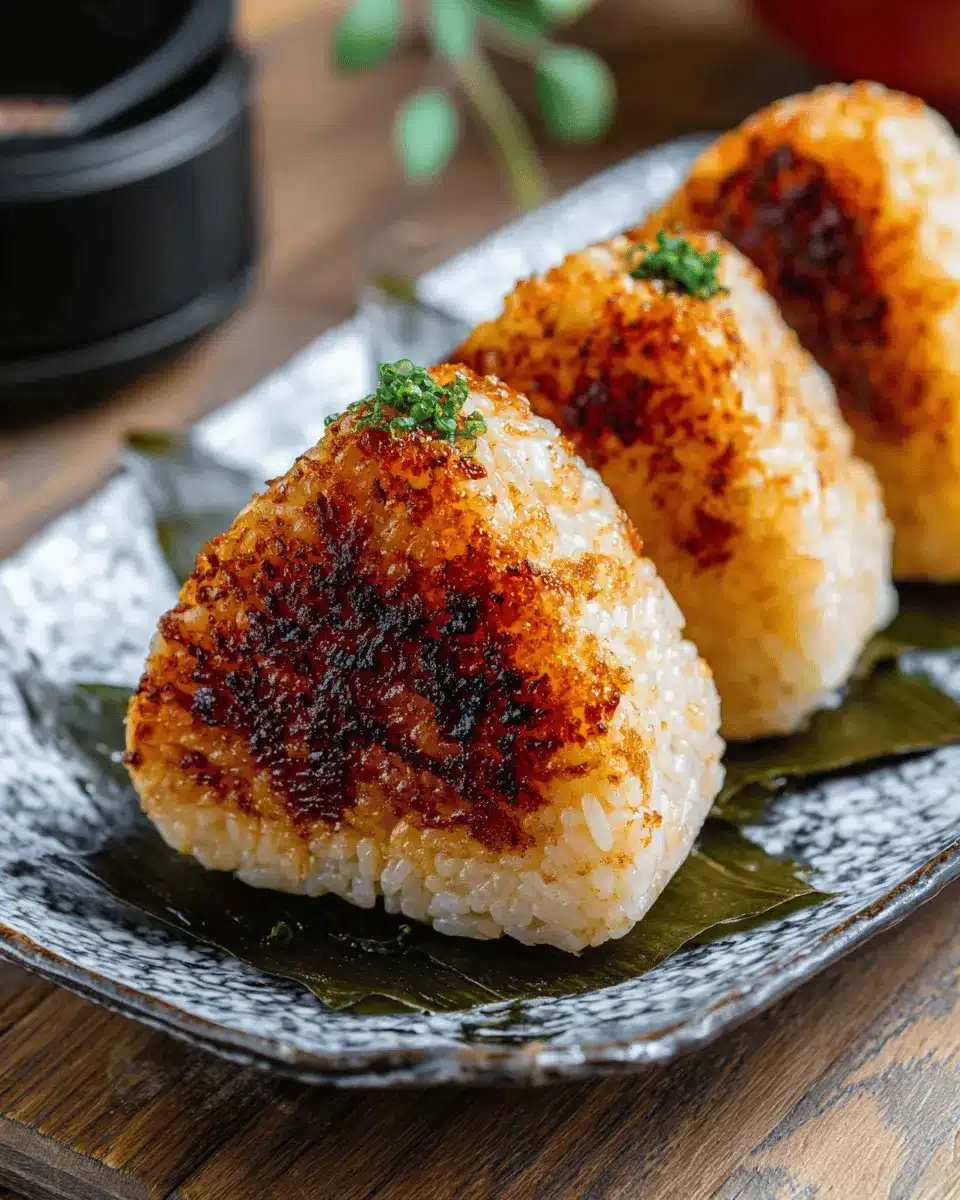
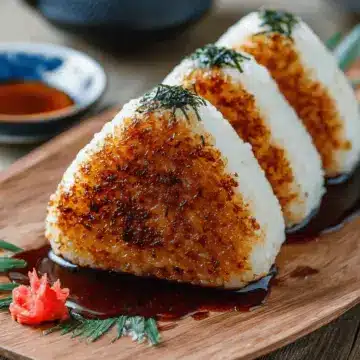
Yaki onigiri, or grilled rice balls, are a delightful twist on traditional Japanese onigiri. These little gems are typically made from short-grain rice that is seasoned, shaped into triangles, and then grilled to perfection. The grilling process gives them a satisfying crispy crust while the inside remains soft and chewy, enhancing their natural flavors. Often brushed with a savory soy glaze, yaki onigiri offers a comforting taste of Japan that can be enjoyed as a snack, side dish, or even a quick meal.
For those looking to dive deeper into the world of Japanese cuisine, Yaki Onigiri pairs beautifully with a variety of fillings like pickled vegetables or grilled meats for an added punch of flavor.
A Personal Journey with Yaki Onigiri
My love for yaki onigiri began during a trip to Japan, where I first encountered them at a bustling street market in Tokyo. I was instantly captivated by the enticing aroma wafting from the grilling rice balls. With every crunchy bite, I could taste the rich culture and warmth of Japanese cooking. I soon realized how versatile they were—ideal for picnics, lunchboxes, or a simple dinner at home.
Creating these grilled rice balls at home has become a cherished tradition for me, especially now that I can experiment with different fillings and seasonings. If you’re looking for a quick yet delicious way to elevate your culinary skills, yaki onigiri is the perfect recipe to try. Let’s get started!
Ingredients for Yaki Onigiri
Creating delicious yaki onigiri starts with selecting the right ingredients. Here’s a quick guide to what you’ll need.
Key Ingredients for the Rice
- Uncooked Japanese short-grain white rice: This is critical for achieving the perfect texture. Use 2¼ cups for about 9 rice balls, or adjust the quantity as needed.
- Water: The correct rice-to-water ratio (1:1.1 or 1:1.2) is key to cooking the rice just right.
For seasoning, you'll blend:
- Soy sauce
- Sugar
- Toasted sesame oil
- Kosher salt
These ingredients will enhance the flavor profile, creating that iconic savory taste that yaki onigiri lovers adore.
Optional Enhancements
Feel free to get creative! You can add:
- Fillings: Consider using ingredients like chicken ham, turkey bacon, or even sautéed vegetables.
- Toppings: Sprinkle sesame seeds for added crunch or drizzle some unagi sauce for a sweet touch.
These enhancements can elevate your yaki onigiri experience, making them uniquely yours! For more insights on rice usage, check out The Rice Association.
Preparing Yaki Onigiri
Making yaki onigiri is a delightful and rewarding experience that combines simple ingredients with traditional techniques. Let’s walk through the steps to create these savory grilled rice balls.
Step 1: Prepare the Rice
Start with 2¼ cups of uncooked Japanese short-grain white rice, which is essential for that perfect sticky texture. Rinse the rice thoroughly under cold water until the water runs clear. This helps remove excess starch, yielding fluffier grains. After rinsing, let the rice soak in water for about 20-30 minutes to ensure it cooks evenly. Once soaked, cook the rice according to your preferred method—whether it's a rice cooker, stovetop, or Instant Pot. For this recipe, you'll need approximately 2½ cups of water to achieve the ideal consistency.
Step 2: Season the Cooked Rice
Once your rice is fluffy and hot, it's time to enhance its flavor. In a small bowl, combine 3 tablespoons of soy sauce, 1 tablespoon of sugar, and 1 tablespoon of toasted sesame oil, then warm this mixture in the microwave for 30-60 seconds until the sugar dissolves. Add a pinch of kosher salt, and then gently fold the seasoning into the hot cooked rice using a rice paddle. Be careful not to mash the rice—this is crucial for maintaining that delightful texture!
Step 3: Shape the Onigiri
To make shaping your yaki onigiri easier, a mold can be quite helpful, or you can use your hands if desired. If you're using a mold, moisten it slightly to prevent sticking. Fill the mold with the seasoned rice, press down firmly, and then flip it onto a plate lined with parchment paper. If you're shaping by hand, wet your palms, take a handful of rice, and press it into a triangle shape. Remember to handle the rice gently to maintain its structure.
Step 4: Pan-Grilling the Onigiri
Now, let’s bring on the heat! For pan-grilling, simply place your rice balls onto a frying pan with parchment paper to prevent sticking. Grill them on medium-low heat, turning occasionally until all sides are crispy and golden. This is where they develop that irresistible crunch. Be patient—rushing this step can lead to uneven cooking.
Step 5: Apply the Glaze
To take your yaki onigiri to the next level, prepare a glaze by mixing 1 tablespoon of soy sauce with 1 teaspoon of toasted sesame oil. Once your rice balls are beautifully grilled, brush on the glaze while they’re still in the pan. This adds a glossy finish and rich flavor. Just be cautious not to burn the onigiri; a low heat is your best friend here.
And there you have it—your delicious yaki onigiri is ready to be enjoyed! Whether you serve them with pickled vegetables, miso soup, or on their own, you're in for a delicious treat. Happy grilling!
Variations on Yaki Onigiri
Different Seasoning Options
Elevate your yaki onigiri by experimenting with various seasonings! Consider adding a pinch of furikake, a Japanese rice seasoning blend that can introduce unique flavors like sesame or dried fish. For a spicy kick, mix in some shichimi togarashi, a seven-spice blend. You can also opt for a sweeter glaze by incorporating mirin or even honey into your soy sauce mixture for a touch of richness.
Stuffed Yaki Onigiri Ideas
Why stop at plain rice balls when you can delight your taste buds with stuffed yaki onigiri? Try filling them with savory ingredients like chicken ham, turkey bacon, or even sautéed vegetables for a burst of flavor. Cream cheese or pickled plum (umeboshi) adds a delightful creaminess and tang. Get creative; the filling possibilities are endless! For tips on other delicious fillings, check out justonecookbook.com.
Cooking Notes for Yaki Onigiri
Tips for Perfect Texture
To achieve the best texture for your yaki onigiri, it's crucial to use Japanese short-grain rice, which is naturally sticky. Before cooking, soak the rice for 20-30 minutes to enhance its stickiness, allowing it to hold shape when molded. Make sure the cooked rice is slightly warm while shaping; this helps bind the grains and achieves that delightful, tender center.
Common Mistakes to Avoid
One common mishap is not pressing the rice balls firmly enough during shaping, leading to fragile onigiri that fall apart while grilling. Another mistake is flipping too soon when pan-grilling. Let each side develop a crispy, golden crust before turning; a gentle nudge is all it takes! Lastly, be cautious with the glaze—it’s easy to burn the rice if you’re not attentive. Keep these tips in mind, and you'll have perfect yaki onigiri every time!
Serving Suggestions for Yaki Onigiri
Best Pairings for Onigiri
Pair your delicious yaki onigiri with a side of miso soup for a classic Japanese experience. Fresh pickled vegetables, like tsukemono, add a crunchy contrast, while a light salad drizzled with sesame dressing brightens each bite. Want something heartier? A few slices of turkey bacon or chicken ham on the side are excellent choices to satisfy your craving.
Creative Ways to Serve
Serve your yaki onigiri during a casual gathering by creating a festive rice ball bar! Offer various fillings like grilled vegetables, spicy tuna, or even kimchi—let your guests customize their experience. For a delightful twist, try drizzling with sauces like teriyaki or a spicy mayo. You can also serve them as an app at a game night, accompanied by a refreshing non-alcoholic drink such as matcha latte or iced tea. Explore great drink recipes for your gatherings here.
Incorporating your own flavors will elevate your yaki onigiri and impress everyone at the table!
Time Breakdown for Yaki Onigiri
Preparation Time
To kick off your yaki onigiri adventure, set aside about 15 minutes for preparation. This includes soaking the rice, seasoning it, and shaping the rice balls. When you're ready to dive into a delicious project, this time commitment is totally reasonable for such a tasty treat!
Cooking Time
Once your rice is prepped and shaped, you'll spend around 15 minutes cooking them to crispy perfection. This phase involves pan-grilling the rice balls, ensuring each side is perfectly brown and ready to soak up that smoky glaze. Don't rush—good things take time!
Total Time
From start to finish, expect to invest about 30 minutes in making your yaki onigiri. Whether you’re cooking for yourself or entertaining friends, this manageable timeframe means you can whip up a delightful dish without dedicating your entire day to cooking. Perfect for busy young professionals who crave home-cooked goodness!
If you're curious about other Japanese dishes or need tips on rice cooking methods, explore resources from Just One Cookbook for further inspiration!
Nutritional Facts for Yaki Onigiri
When you indulge in yaki onigiri, you’re not just treating your taste buds; you’re also nourishing your body. Here’s a quick look at the nutritional profile per serving:
Calories
Each yaki onigiri contains approximately 207 calories, making it a satisfying snack or meal option without overindulging.
Protein
These grilled rice balls offer around 4 grams of protein, helping to keep you full and energized throughout the day.
Sodium
One serving has about 420 mg of sodium, largely due to the soy sauce used. If you're watching your sodium intake, consider low-sodium soy sauce alternatives for a healthier option.
For deeper insights into balanced eating, check out this Nutritional Guide from the USDA!
FAQs about Yaki Onigiri
Can I use brown rice for onigiri?
Yes, you can use brown rice for making yaki onigiri, but bear in mind that the texture and flavor will differ from traditional white rice. Brown rice has a nuttier flavor and a chewier texture, which could create a delightful twist on this classic dish. Just ensure you adjust the water ratio and cooking time accordingly, as brown rice typically requires more water and a longer cooking time. For tips on cooking brown rice, check this guide.
What can I use instead of soy sauce?
If you’re looking for alternatives to soy sauce, consider using tamari (a gluten-free option) or coconut aminos for a similar umami flavor. For a unique twist, you can also try miso paste diluted in water. These options can enhance the flavor profile without sacrificing the essence of yaki onigiri.
How do I store leftover onigiri?
To keep your yaki onigiri fresh, wrap each rice ball individually in plastic wrap and store them in the freezer for up to a month. If you prefer to refrigerate them, wrap them in a thick kitchen towel to maintain moisture. Enjoy your grilled rice balls within two days for the best flavor and texture! When you're ready to eat, simply reheat them in a microwave or a frying pan.
Conclusion on Yaki Onigiri
Making yaki onigiri is a delightful way to elevate your culinary skills while enjoying a heartwarming Japanese treat. With a crispy exterior and a savory interior, these grilled rice balls are perfect for on-the-go snacking or as a side dish. Give them a try; you won't be disappointed!
Yaki Onigiri (Grilled Rice Ball)
Equipment
- rice cooker
- frying pan
- onigiri mold
- Microwave
Ingredients
For the Steamed Rice
- 2.25 cups uncooked Japanese short-grain white rice 3 rice cooker cups, 540 ml for 9 rice balls
- 2.5 cups water or 1⅔ cups (400 ml) for 2 rice cooker cups
For the Rice Seasoning
- 3 tablespoon soy sauce or 2 tablespoon for 2 rice cooker cups
- 1 tablespoon sugar or 2 teaspoon for 2 rice cooker cups
- 1 tablespoon toasted sesame oil or 2 teaspoon for 2 rice cooker cups
- 0.25 teaspoon Diamond Crystal kosher salt or ⅛ teaspoon for 2 rice cooker cups
For the Glaze
- 1 tablespoon soy sauce
- 1 teaspoon toasted sesame oil
Instructions
Preparation
- Soak the Japanese short-grain rice for 20-30 minutes.
- Cook the rice in a rice cooker with 2½ cups water for 2¼ cups rice.
Season the Cooked Rice
- Combine soy sauce and sugar in a bowl, microwave until hot, and whisk until sugar dissolves.
- Add sesame oil and kosher salt to the mixture.
- Transfer hot cooked rice to a bowl, add seasoning mixture, and combine gently.
Shape the Onigiri
- Use an onigiri mold or plastic wrap to shape the rice into rice balls.
- Press rice firmly to keep its shape while grilling.
Pan-Grill the Onigiri
- Combine soy sauce and sesame oil for the glaze, place rice balls on parchment paper in the frying pan.
- Grill on medium-low heat until crispy and lightly browned, rotating as needed.
Glaze the Onigiri
- Brush the onigiri with glaze after toasting and grill until the glaze is caramelized.
Store the Onigiri
- Seal individually in plastic wrap and freeze or refrigerate with a towel.
Leave a Reply