
Introduction to Baked Italian Subs
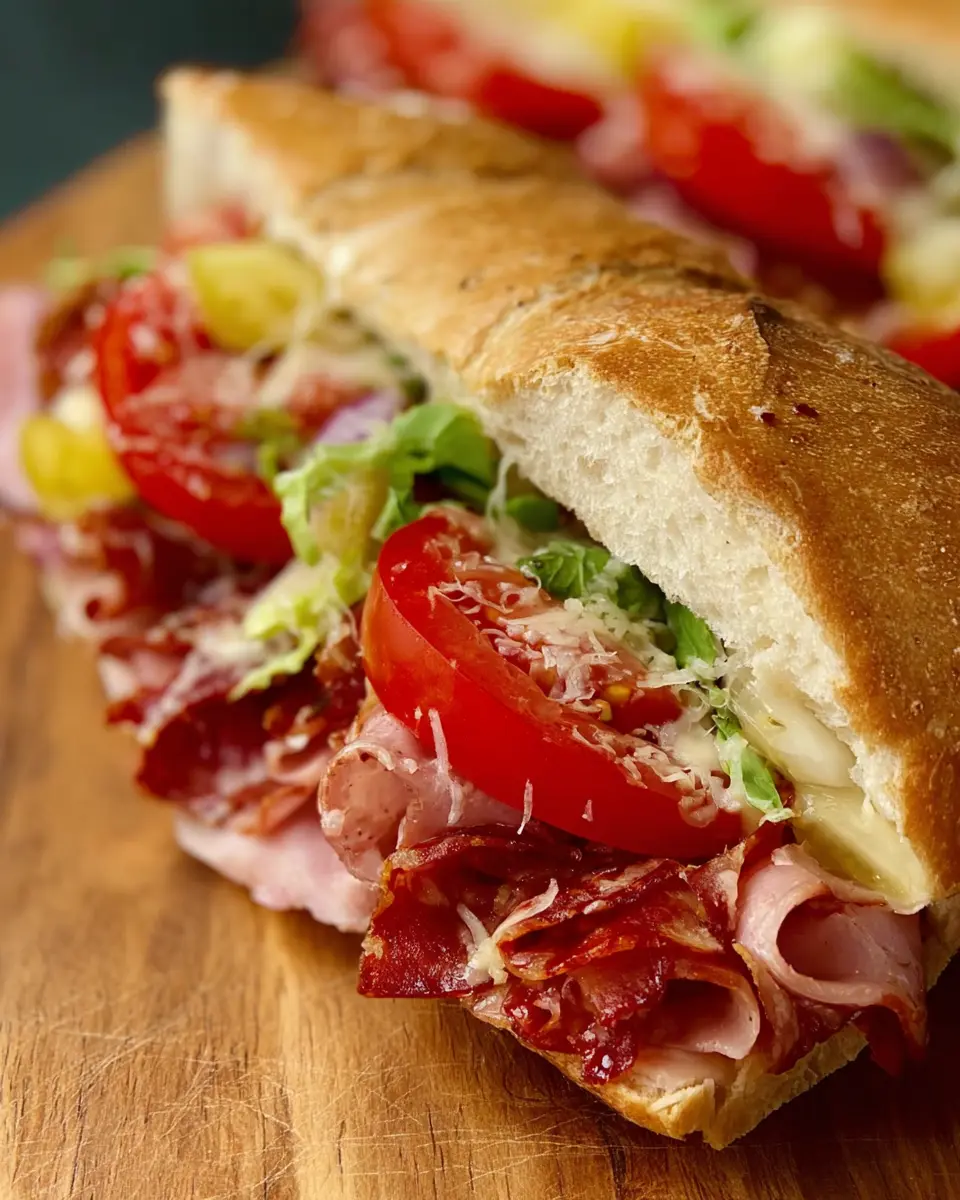
Baked Italian subs are a delightful twist on your typical sandwich experience. Imagine sinking your teeth into a warm, gooey, and flavor-packed creation that’s not just satisfying but also incredibly simple to make at home. Why opt for takeout when you can whip up this classic comfort food in just 15 minutes?
Why Homemade Baked Italian Subs are a Game-Changer?
Creating your own baked Italian sub allows for endless customization. Whether you’re a fan of classic ingredients like chicken ham, Genoa salami, and provolone cheese, or prefer to throw in your favorite toppings like fresh veggies, the choice is yours! Plus, by making them at home, you not only save money but also control the quality of each ingredient.
Did you know that making your own sandwiches can be healthier? You can use fresh produce and lean meats, which contribute to a delicious yet well-balanced meal. According to a recent study, preparing meals at home can lead to healthier eating habits, giving you more energy for your busy day.
So, gather your favorite hoagie rolls and jackpot of deli meats, and get ready for a hot, comforting meal straight from your oven. Trust me, your taste buds will thank you!
Ingredients for Baked Italian Subs
Essential ingredients for the perfect sub
To craft your own mouthwatering baked Italian sub, stock up on these essential ingredients:
- 2 (7- to 8-inch) hoagie rolls: Freshness is key! Buy quality rolls from your local bakery for the best texture.
- 6 thin slices chicken ham: A lean alternative that still packs in flavor.
- 6 thin slices Genoa salami: Adds that classic Italian richness.
- 2 slices provolone cheese: Halve them for even melty goodness.
- ⅓ cup sliced banana peppers: For a touch of tanginess.
- Drizzle of olive oil: Enhances every bite with richness.
- Pinch of oregano, salt, and pepper: Simple spices that elevate flavor.
Optional toppings for added flavor
While the basics will make for a delicious meal, feel free to explore these optional toppings to personalize your baked Italian sub:
- Tomato slices: Fresh and juicy; perfect for summer!
- Shredded lettuce: Adds crunch and freshness.
- Thinly sliced red onion: For a bit of bite.
- A splash of red wine vinegar: Zesty and brightens up the flavors.
Feel free to mix and match according to your taste—your sub experience is just a few ingredients away! Consider checking out resources like Serious Eats for more tips on creating the perfect sandwich!
Preparing Baked Italian Subs
If you're looking to make a delicious homemade sandwich that rivals anything from a deli, you'll love preparing these Baked Italian Subs. Let’s walk through the straightforward process to create this mouthwatering dish that’s sure to impress.
Gather and prep your ingredients
Before you dive into assembly, gathering all your ingredients is key. You’ll need:
- 2 hoagie rolls (7-8 inches)
- 6 slices of chicken ham
- 6 slices of Genoa salami
- 6 slices of capicola ham (optional, but highly recommended for that authentic flavor!)
- 2 slices of provolone cheese, halved
- ⅓ cup of sliced banana peppers, adjusting to your preference
- Tomato slices, shredded lettuce, and red onion for fresh toppings
- Olive oil and red wine vinegar (or your favorite vinegar) for dressing
- Seasonings: oregano, salt, and freshly ground black pepper
Having everything in place makes the whole process smoother. Prepping the veggies ahead can also save you time; fresh lettuce and tomatoes add the final touch!
Assemble the sub layers
With your ingredients ready, it’s time to build your baked Italian sub. Start by slicing the hoagie rolls lengthwise—don’t cut all the way through; you want them to stay intact. Lay them open side-up on a lined baking sheet for easy cleanup.
Now, layer those delightful meats! Begin with the chicken ham and follow with the salami and capicola. Pro tip: Fold the slices to fit snugly into the roll. Finally, place your provolone on top and sprinkle the banana peppers—these tangy bites add a fantastic zing!
Bake to cheesy perfection
Preheat that oven to 350°F (175°C). Slide your assembled subs into the oven and let them bake for about 5 to 8 minutes. Watch closely—once the cheese starts to melt and bubble, it’s time to pull them out. You want everything to be gooey but not overdone!
Customize your toppings
While the baked Italian sub cools slightly, it’s time for toppings. Dress it up with fresh tomatoes, crispy shredded lettuce, and thinly sliced red onions. Drizzle on olive oil and your chosen vinegar, then season it with oregano, salt, and pepper to create that perfect bite. The fresh toppings are what elevate these from good to gourmet!
Serve warm and enjoy
Cut your subs in half if you’re feeling generous (or keep them whole for a hearty meal) and serve them warm. There’s no better feeling than biting into a homemade sandwich stuffed with all those vibrant flavors. Whether you’re treating yourself after a long day or hosting a casual get-together with friends, these baked Italian subs are bound to be a hit! Enjoy your culinary creation!

Variations on Baked Italian Subs
Everyone loves a baked Italian sub, but what if you could shake things up a bit? Here are two delicious variations to try!
Veggie-loaded Italian Sub
For a lighter twist, layer your hoagie with an array of fresh veggies. Start with spinach, bell peppers, and zucchini, then top with your favorite cheese—go for a mozzarella or feta for added creaminess. A drizzle of balsamic glaze brings it all together, making this a crunchy, satisfying option for vegetarians or anyone looking to add more greens to their meal.
Spicy Italian Sub with a Kick
If you're a fan of heat, try this variant! Opt for spicy chicken ham and add jalapeños or red chili flakes to your sub. A dash of pepper jack cheese instead of provolone will crank up the flavor. For a zesty finish, use a chipotle mayo or a spicy aioli as a spread. Trust us; this baked Italian sub will add some excitement to your dinner table!
Feel free to experiment and find your favorite combination. The possibilities are endless!
Cooking Tips and Notes for Baked Italian Subs
Tips for Selecting the Right Bread
Choosing the perfect bread is crucial for a baked Italian sub. Opt for fresh hoagie rolls with a soft interior and a slightly crusty exterior. Look for bread that has a sturdy structure to hold the fillings without falling apart. Local bakeries often have the best options, but if you're in a pinch, many grocery stores offer great alternatives too. The right bread enhances the overall experience, making every bite a delight.
How to Prevent Soggy Subs
Nobody wants a soggy sandwich! To ensure your baked Italian sub stays crispy, consider toasting the inside of the rolls lightly before adding your fillings. This creates a barrier against moisture. Additionally, avoid overloading the subs with wet ingredients like tomatoes right before baking. Keep dressings on the side until serving to maintain that desired crunch. For more tips, check out this helpful guide on preventing soggy sandwiches from Cooking Light.

Serving Suggestions for Baked Italian Subs
Sides that Pair Well with Subs
Complement your Baked Italian Subs with some tantalizing sides! Try a side of crispy sweet potato fries or a refreshing Italian salad dressed with balsamic vinaigrette. For a heartier option, consider potato wedges or garlic bread. You could even serve some zucchini chips for a crunchy alternative. Pairing these delicious sides will enhance the overall meal experience and leave your taste buds wanting more!
Presentation Tips for Your Homemade Creation
When it comes to plating your Baked Italian Subs, presentation is key! Cut each sub in half to showcase the gooey cheese and vibrant veggies inside. Serve them on a rustic wooden board for a charming touch. Consider adding small bowls of extra condiments such as Italian dressing or hot sauce on the side for added flair. Toss in a sprinkle of fresh herbs for color, and voilà! Your homemade creation is ready to impress your guests.
Time Breakdown for Baked Italian Subs
Preparation Time
Getting the ingredients ready takes just about 10 minutes. Slice your rolls and layer your favorite deli meats and toppings. Quick and simple!
Cooking Time
Pop your assembled sandwich in the oven for about 5 to 8 minutes. Keep an eye on it so that the cheese melts perfectly but the roll doesn’t get too crusty.
Total Time
In just 15 minutes, you can savor a delicious baked Italian sub straight from your kitchen. Perfect for a quick lunch or dinner! Want to know more about meal prep ideas? Check out these tips on how to streamline the process.
Nutritional Facts for Baked Italian Subs
Understanding the nutritional profile of your Baked Italian Sub can help you enjoy it guilt-free. Here’s a quick look at what’s packed into this flavorful sandwich:
Calories
Each delicious sub contains approximately 713 calories, making it a satisfying meal option.
Protein
With a hearty boost of 42 grams of protein, this sandwich is perfect for keeping you full and energized throughout your busy day.
Sodium
Be mindful of the 2,825 mg of sodium per serving, which is higher than the daily recommended limit. Balancing the sodium with lower-salt ingredients or pairing it with fresh veggies can help!
By keeping these nutritional facts in mind, you can enjoy your Baked Italian Sub while making informed choices for your health. For more healthy eating tips, check out resources like the American Heart Association or ChooseMyPlate.gov.
FAQs About Baked Italian Subs
Can I make Baked Italian Subs ahead of time?
Absolutely! You can prep your Baked Italian Subs in advance by layering the ingredients inside the hoagie rolls and wrapping them tightly in foil. When you're ready to serve, simply pop them in the oven to warm up and melt the cheese. This makes for an easy and delicious last-minute meal, perfect for busy weeknights or gatherings!
What are good substitutes for deli meats?
If you're looking to mix it up or accommodate dietary needs, there are plenty of alternatives. Some tasty options include:
- Grilled chicken or sliced turkey breast
- Vegetarian alternatives like hummus or roasted veggies
- Prosciutto for a saltier flavor twist
Experiment and get creative with your fillings—there’s no “one-size-fits-all”!
How can I store leftover subs?
Leftover Baked Italian Subs can be stored in an airtight container in the refrigerator for up to 3 days. To reheat, consider wrapping them in foil and warming them in the oven. This keeps them from getting too crusty, ensuring that cheesy goodness is just as delightful the second time around. Enjoy your delicious creation again!
Conclusion on Baked Italian Subs
In just 15 minutes, you can enjoy a delicious baked Italian sub at home, tailored to your taste. With layers of flavorful meats, fresh vegetables, and gooey cheese, it’s an affordable and satisfying meal. Don’t miss the chance to impress friends with your culinary skills—try this recipe today!

Baked Italian Sub
Equipment
- baking sheet
- Oven
Ingredients
Rolls and Meats
- 2 pieces hoagie rolls 7- to 8-inch
- 6 slices deli ham thin slices
- 6 slices Genoa salami thin slices
- 6 slices capicola ham optional, thin slices
Cheese and Vegetables
- 2 slices provolone cheese halved
- ⅓ cup sliced banana peppers or to taste
- tomato slices to taste, optional
- shredded lettuce to taste, optional
- thinly sliced red onion to taste, optional
Seasonings and Condiments
- olive oil drizzle
- red wine vinegar drizzle
- 1 pinch oregano
- salt to taste
- freshly ground black pepper to taste
Instructions
Preparation
- Preheat the oven to 350 degrees F (175 degrees C). Line a baking sheet with parchment paper.
- Slice rolls in half lengthwise, but do not cut all the way through. Place rolls on the prepared baking sheet, open side up.
- Evenly layer rolls with ham, salami, and capicola, folding to fit. Place the halved provolone and banana peppers on top of the meat.
- Bake in the preheated oven just until cheese starts to melt, 5 to 8 minutes.
- Remove sandwiches from the oven, dress with tomatoes, lettuce, and red onion as desired. Lightly drizzle with olive oil and red wine vinegar; sprinkle with oregano and season with salt and pepper. Serve warm.


Leave a Reply